DDoS Protection Overview
Cloudflare provides always-on, unmetered DDoS protection across all plans.
This covers both network/transport-level attacks (L3/L4) and application-level HTTP floods (L7).
L3/L4 DDoS Protection (Network & Transport Layers)
These are volumetric attacks designed to overwhelm your network or server resources:
- Layer 3 (Network layer) → Massive packet floods like ICMP floods, IP fragmentation attacks.
- Layer 4 (Transport layer) → Overwhelming TCP/UDP services with SYN floods, UDP floods, ACK floods.
⚡ How Cloudflare mitigates automatically:
- 🌐 Anycast distribution → Traffic spreads across Cloudflare’s 300+ global data centers.
- 🛡️ Edge mitigation → Stateless filters block malicious packets before they ever reach your origin.
- 🚫 Protocol-aware filtering → Identifies incomplete/malformed handshakes and drops them.
👉 You don’t need to configure anything — Cloudflare absorbs these attacks by default.
L7 DDoS Protection (Application Layer - HTTP/S)
Unlike L3/L4, application-level attacks try to overwhelm your web app itself by sending huge numbers of HTTP requests (for example, /login or /search).
These can look like “real” traffic and require rules to separate good requests from bad.
Examples:
- Large HTTP floods targeting dynamic endpoints.
- Bots hitting APIs with excessive requests.
⚡ How Cloudflare mitigates HTTP floods:
- Adaptive DDoS rules (automatic detection).
- Rate Limiting rules to throttle excessive requests.
- Custom Rules to challenge/block traffic targeting sensitive paths.
👉 In this workshop, we’ll focus on configuring and overriding HTTP DDoS rules to fine-tune protection for your application.
DDoS Rule Override
- Open a terminal or command prompt on your local machine.
- Run the following command to send multiple requests and trigger the rule:
for i in {1..50}; do echo $i $(curl 'http://<yourdomain.sxplab.com>/echo?blockme=npvenJAo9gMlnd5yD37xQ9P2qp3934' -v -s 2>&1 | grep '< HTTP/1.1'); done

# Replace <yourdomain> with your domain in your labs.
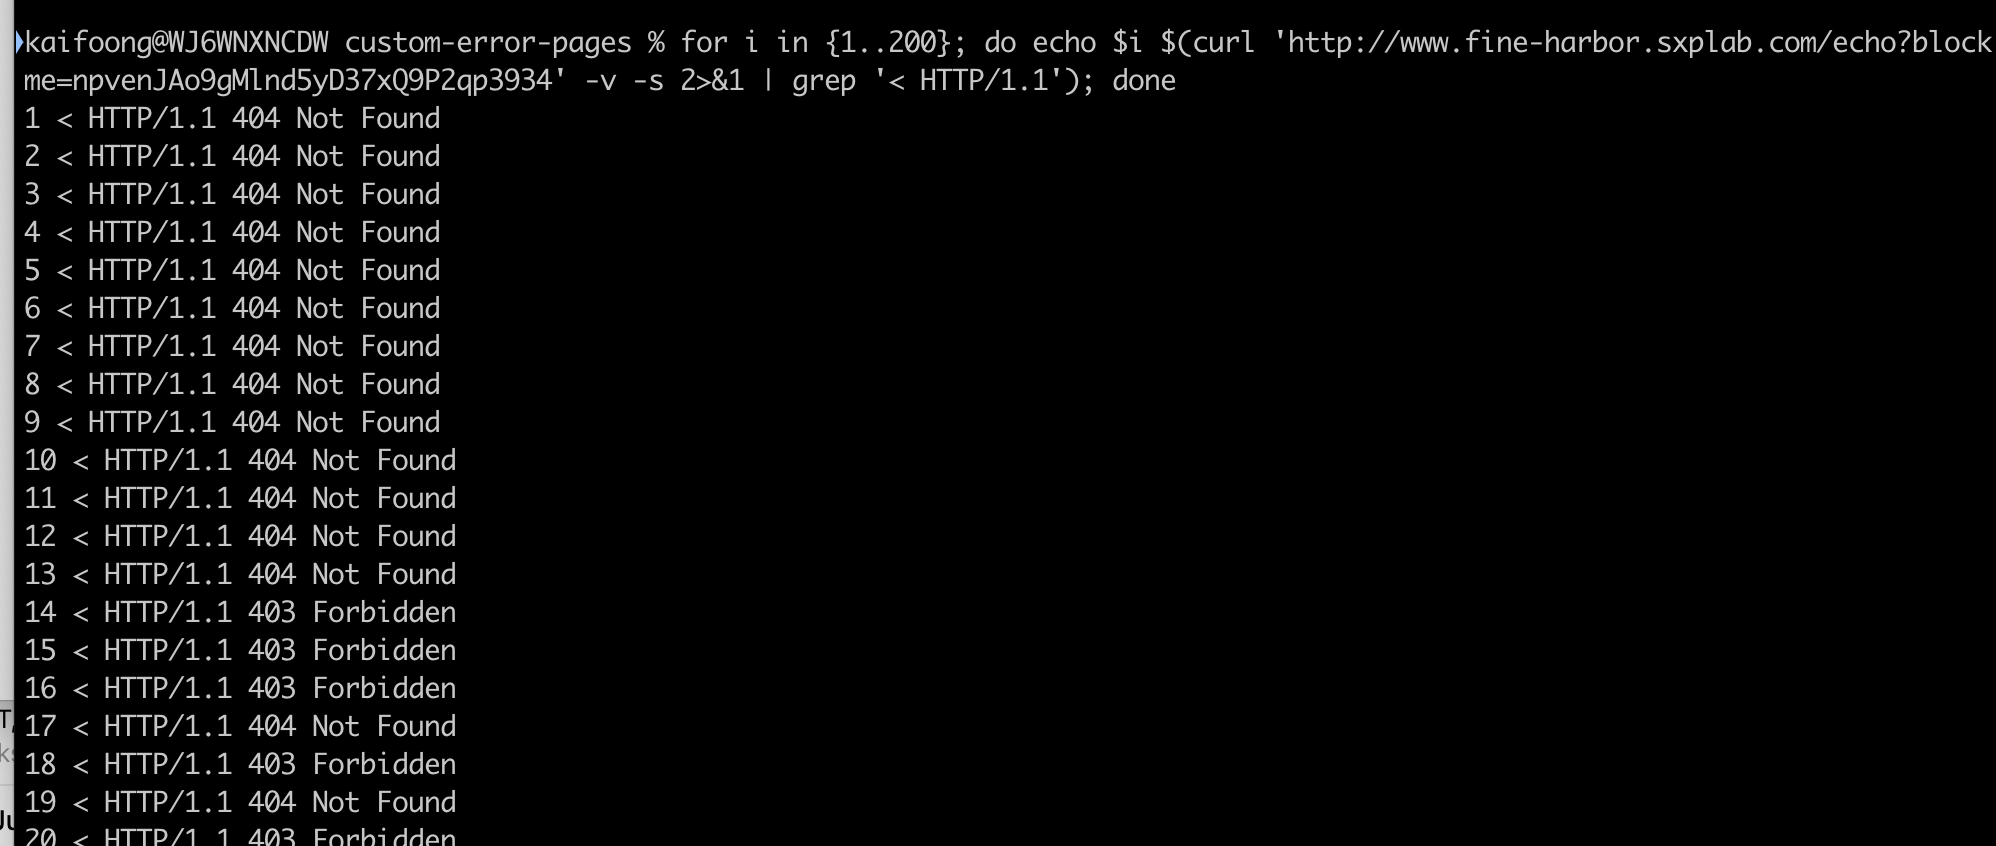
-
On the Cloudflare dashboard, navigate to Security > Analytics > Events
-
You will see some recent blocks, caused by the DDOS Service.
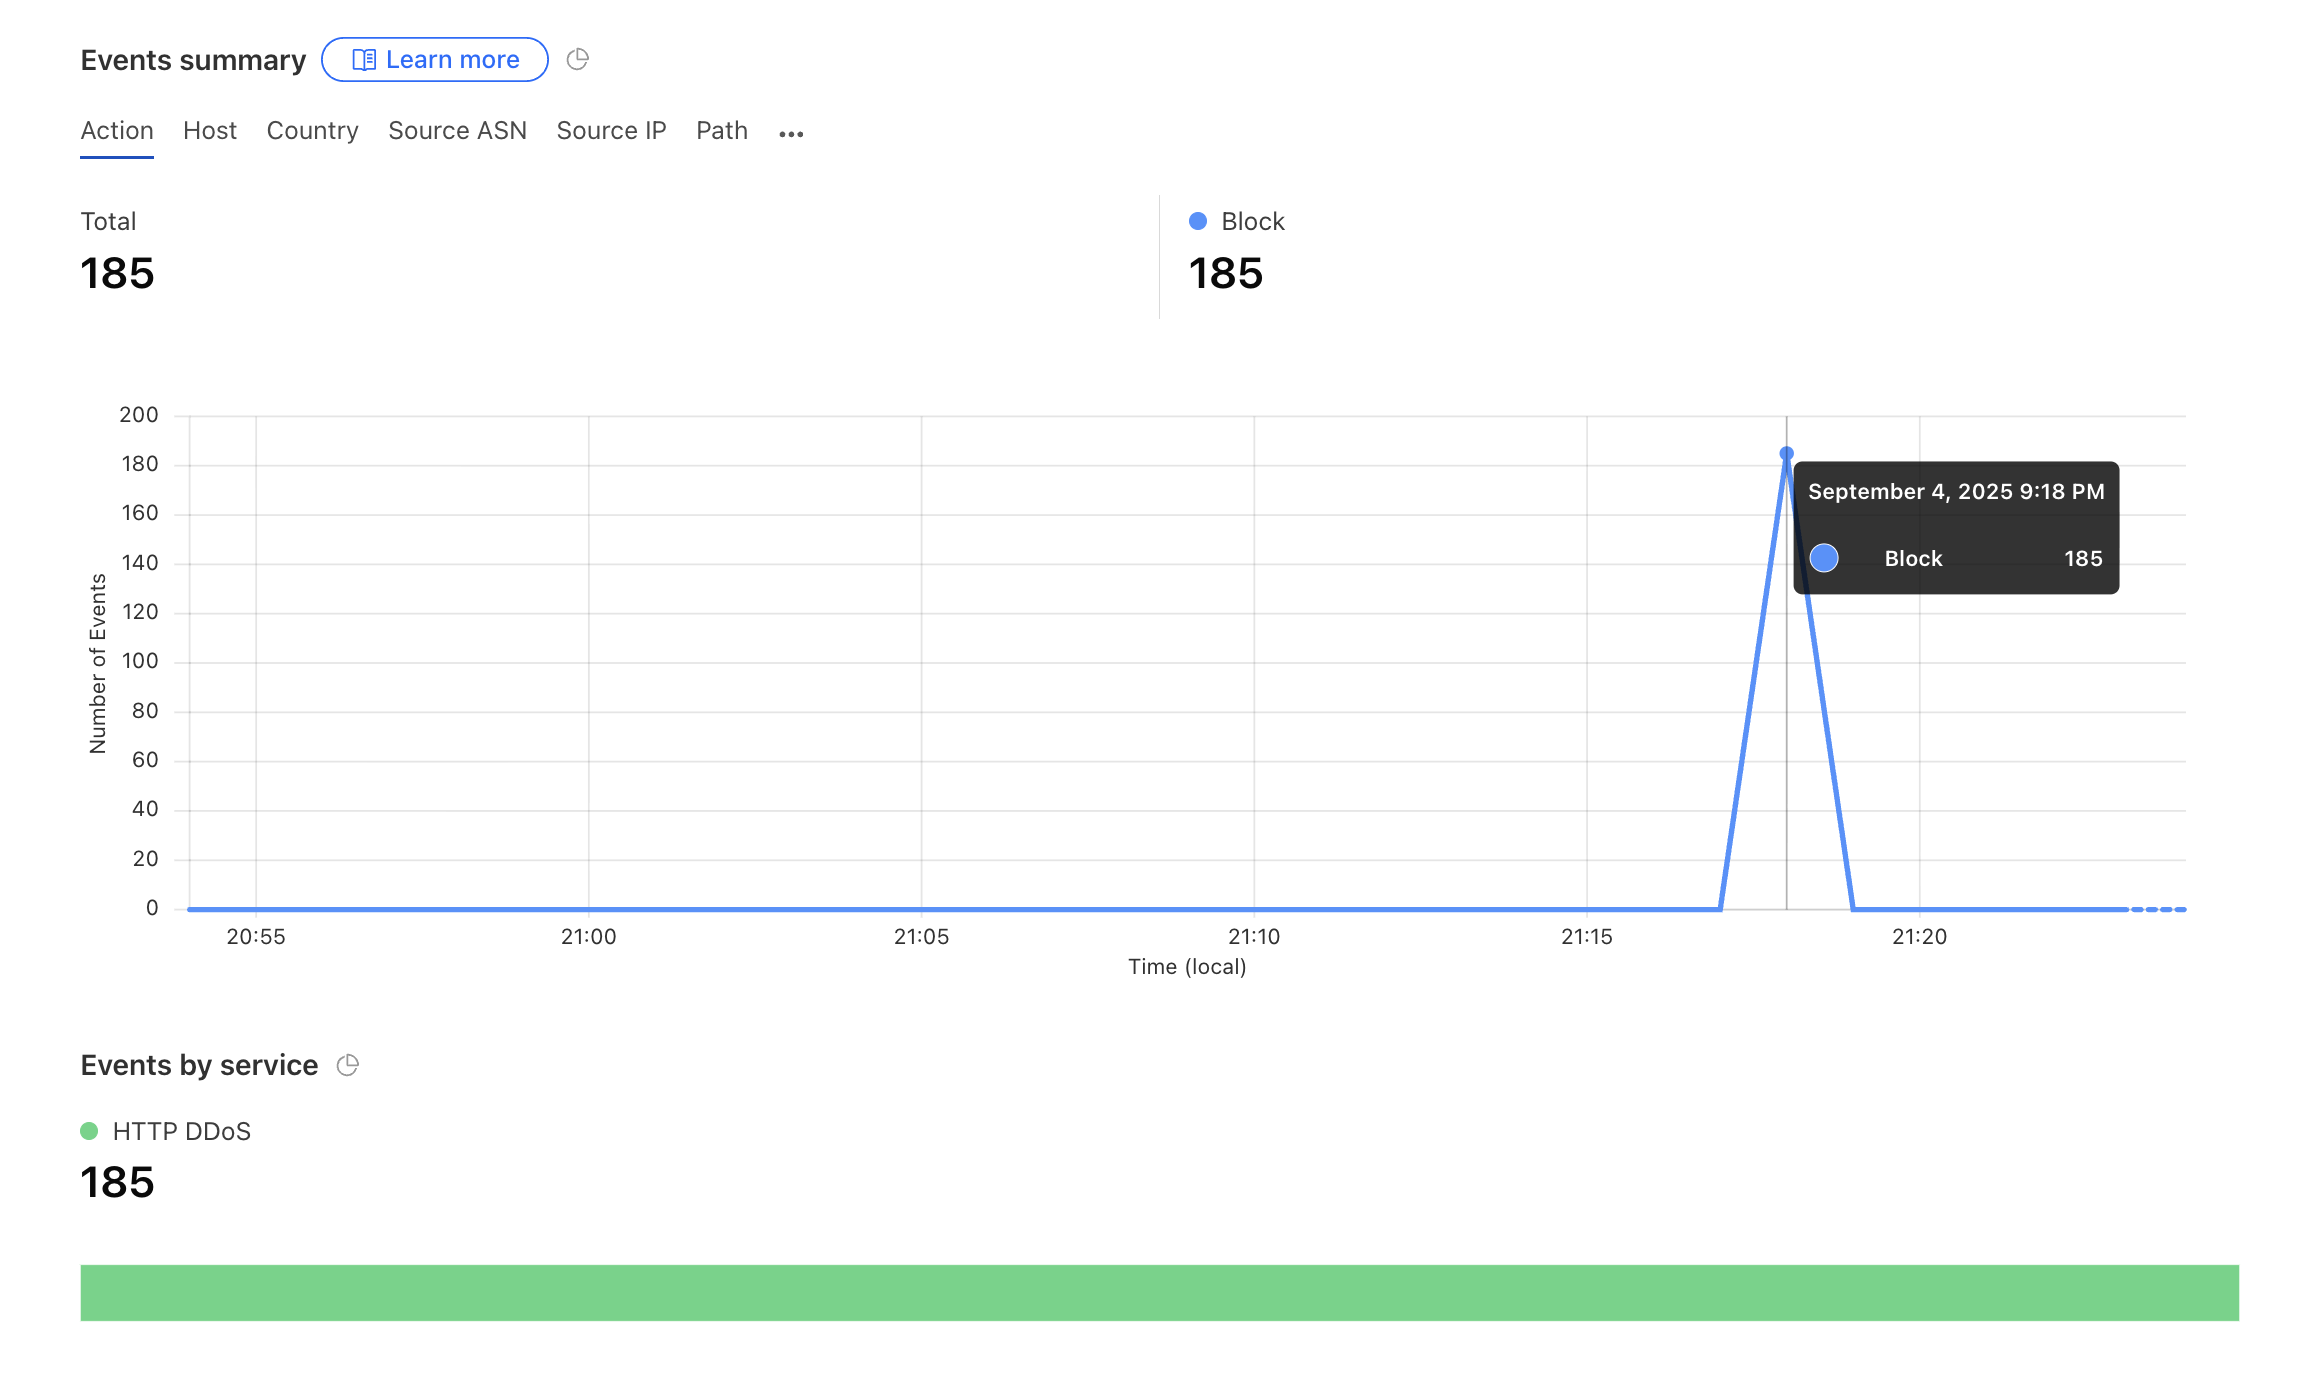
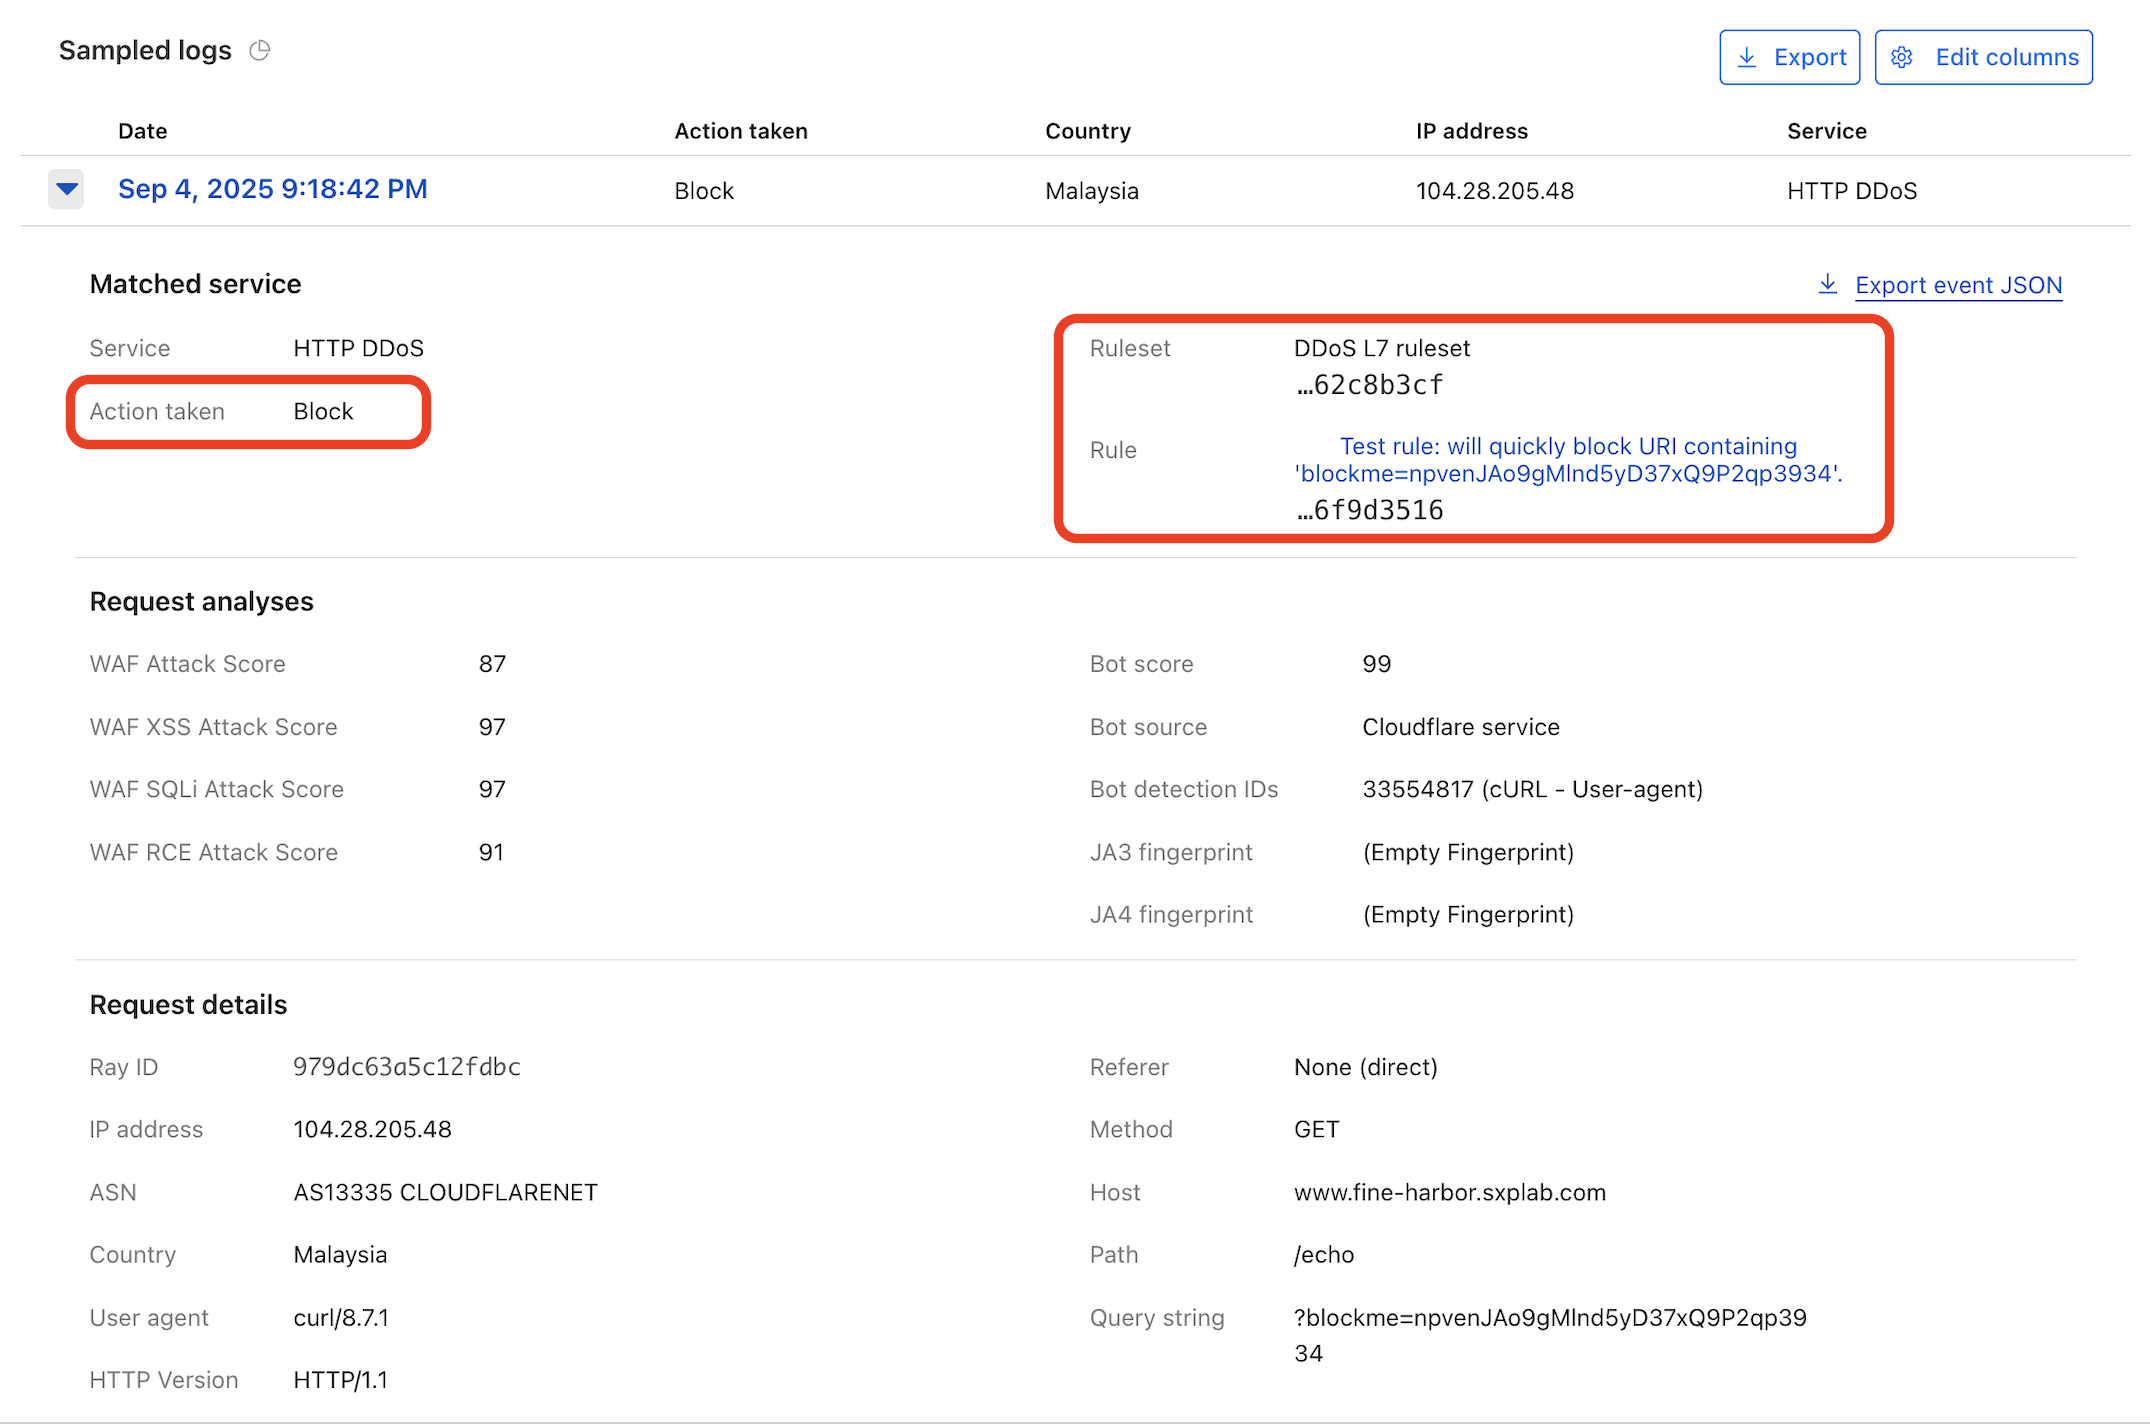
-
In the overview, you will also seeing an alert that a DDoS is detected
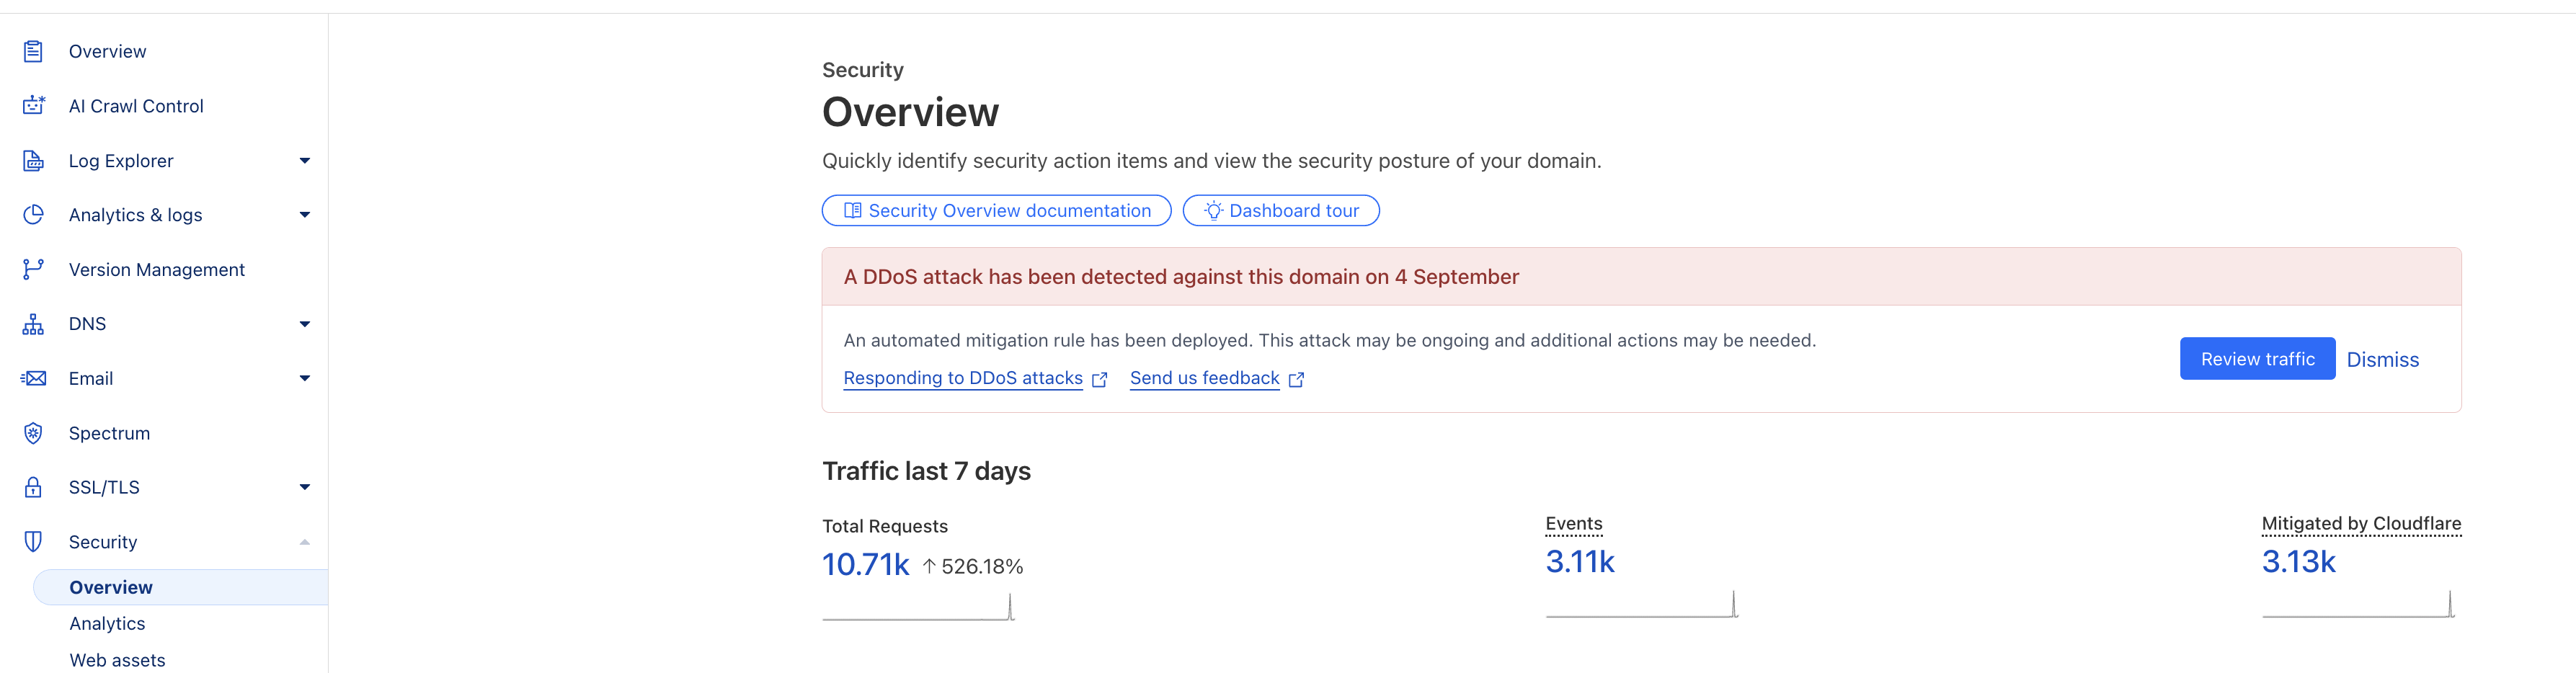
-
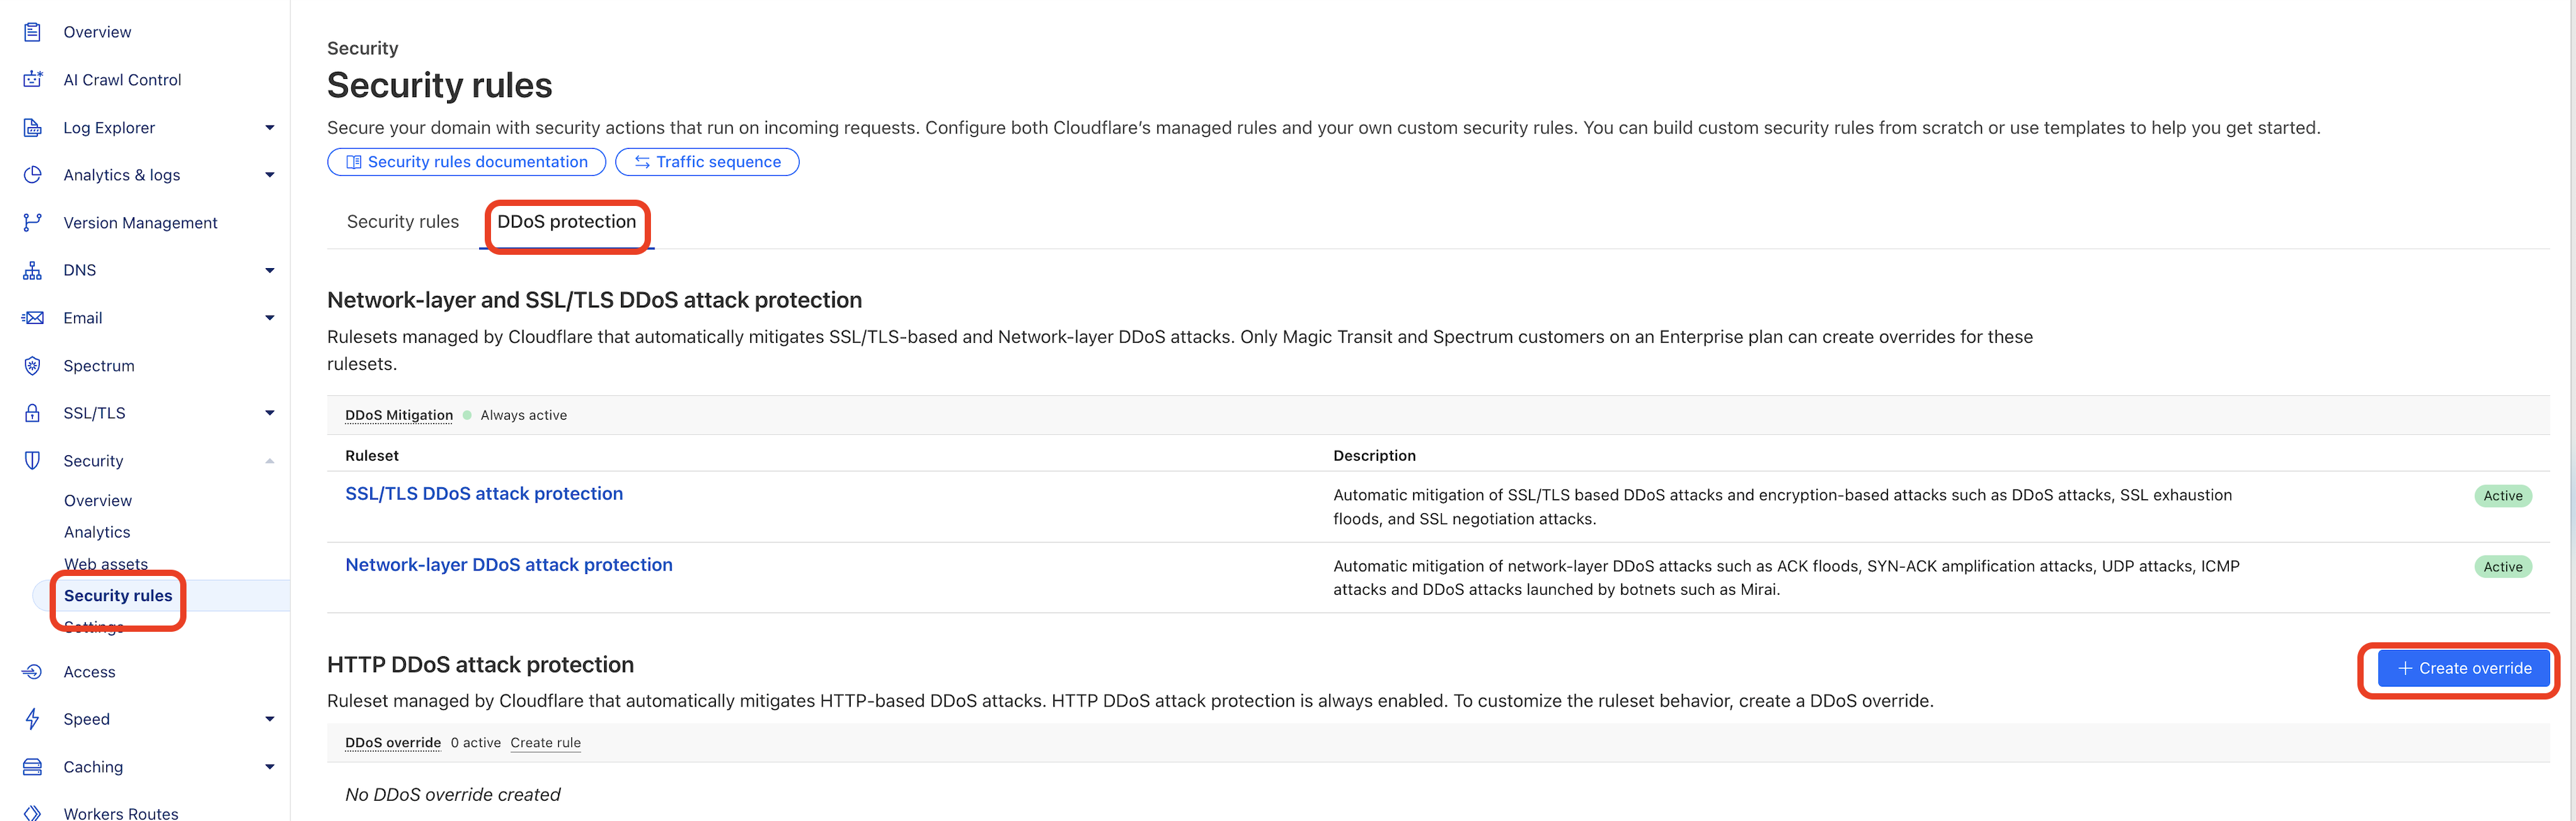
To create a DDoS override, in the Cloudflare Dashboard go to Security > Security rules > DDoS protection > Create override
-
Enter a descriptive name for the rule, such as Test Override Leave everything as default and click on
Browse Rules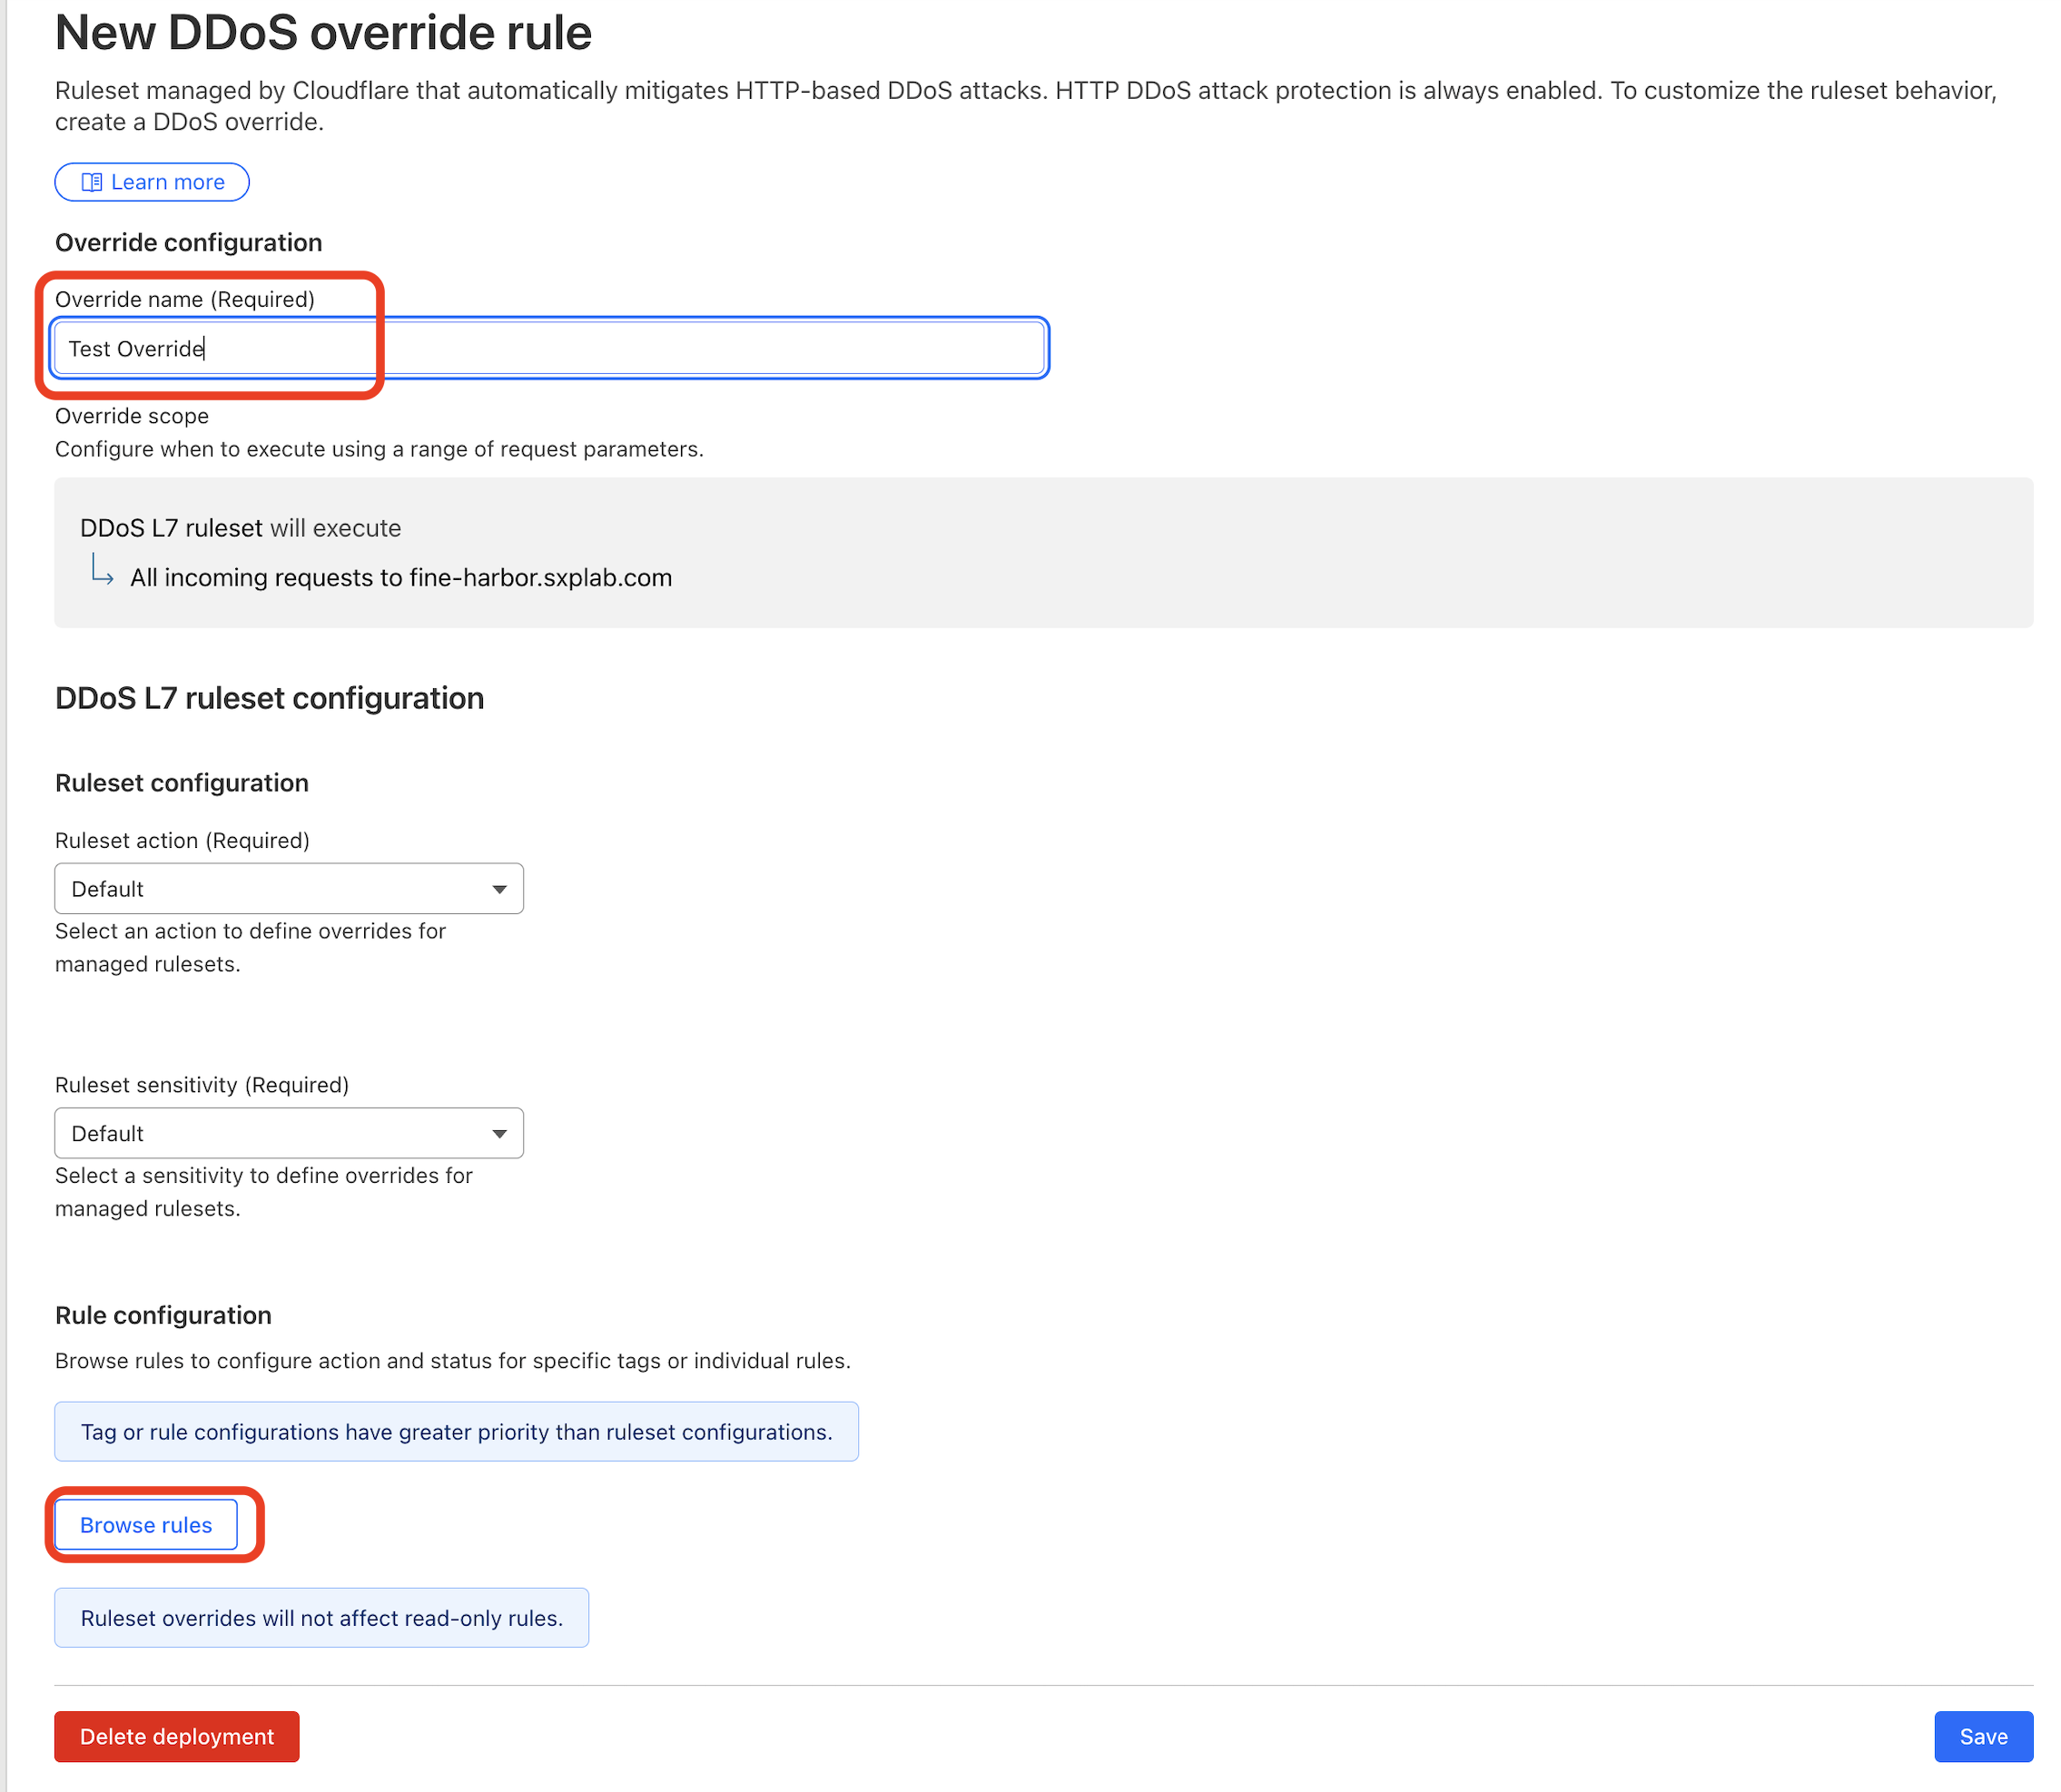
-
Search for the Test rule and override the action to Log Save the override
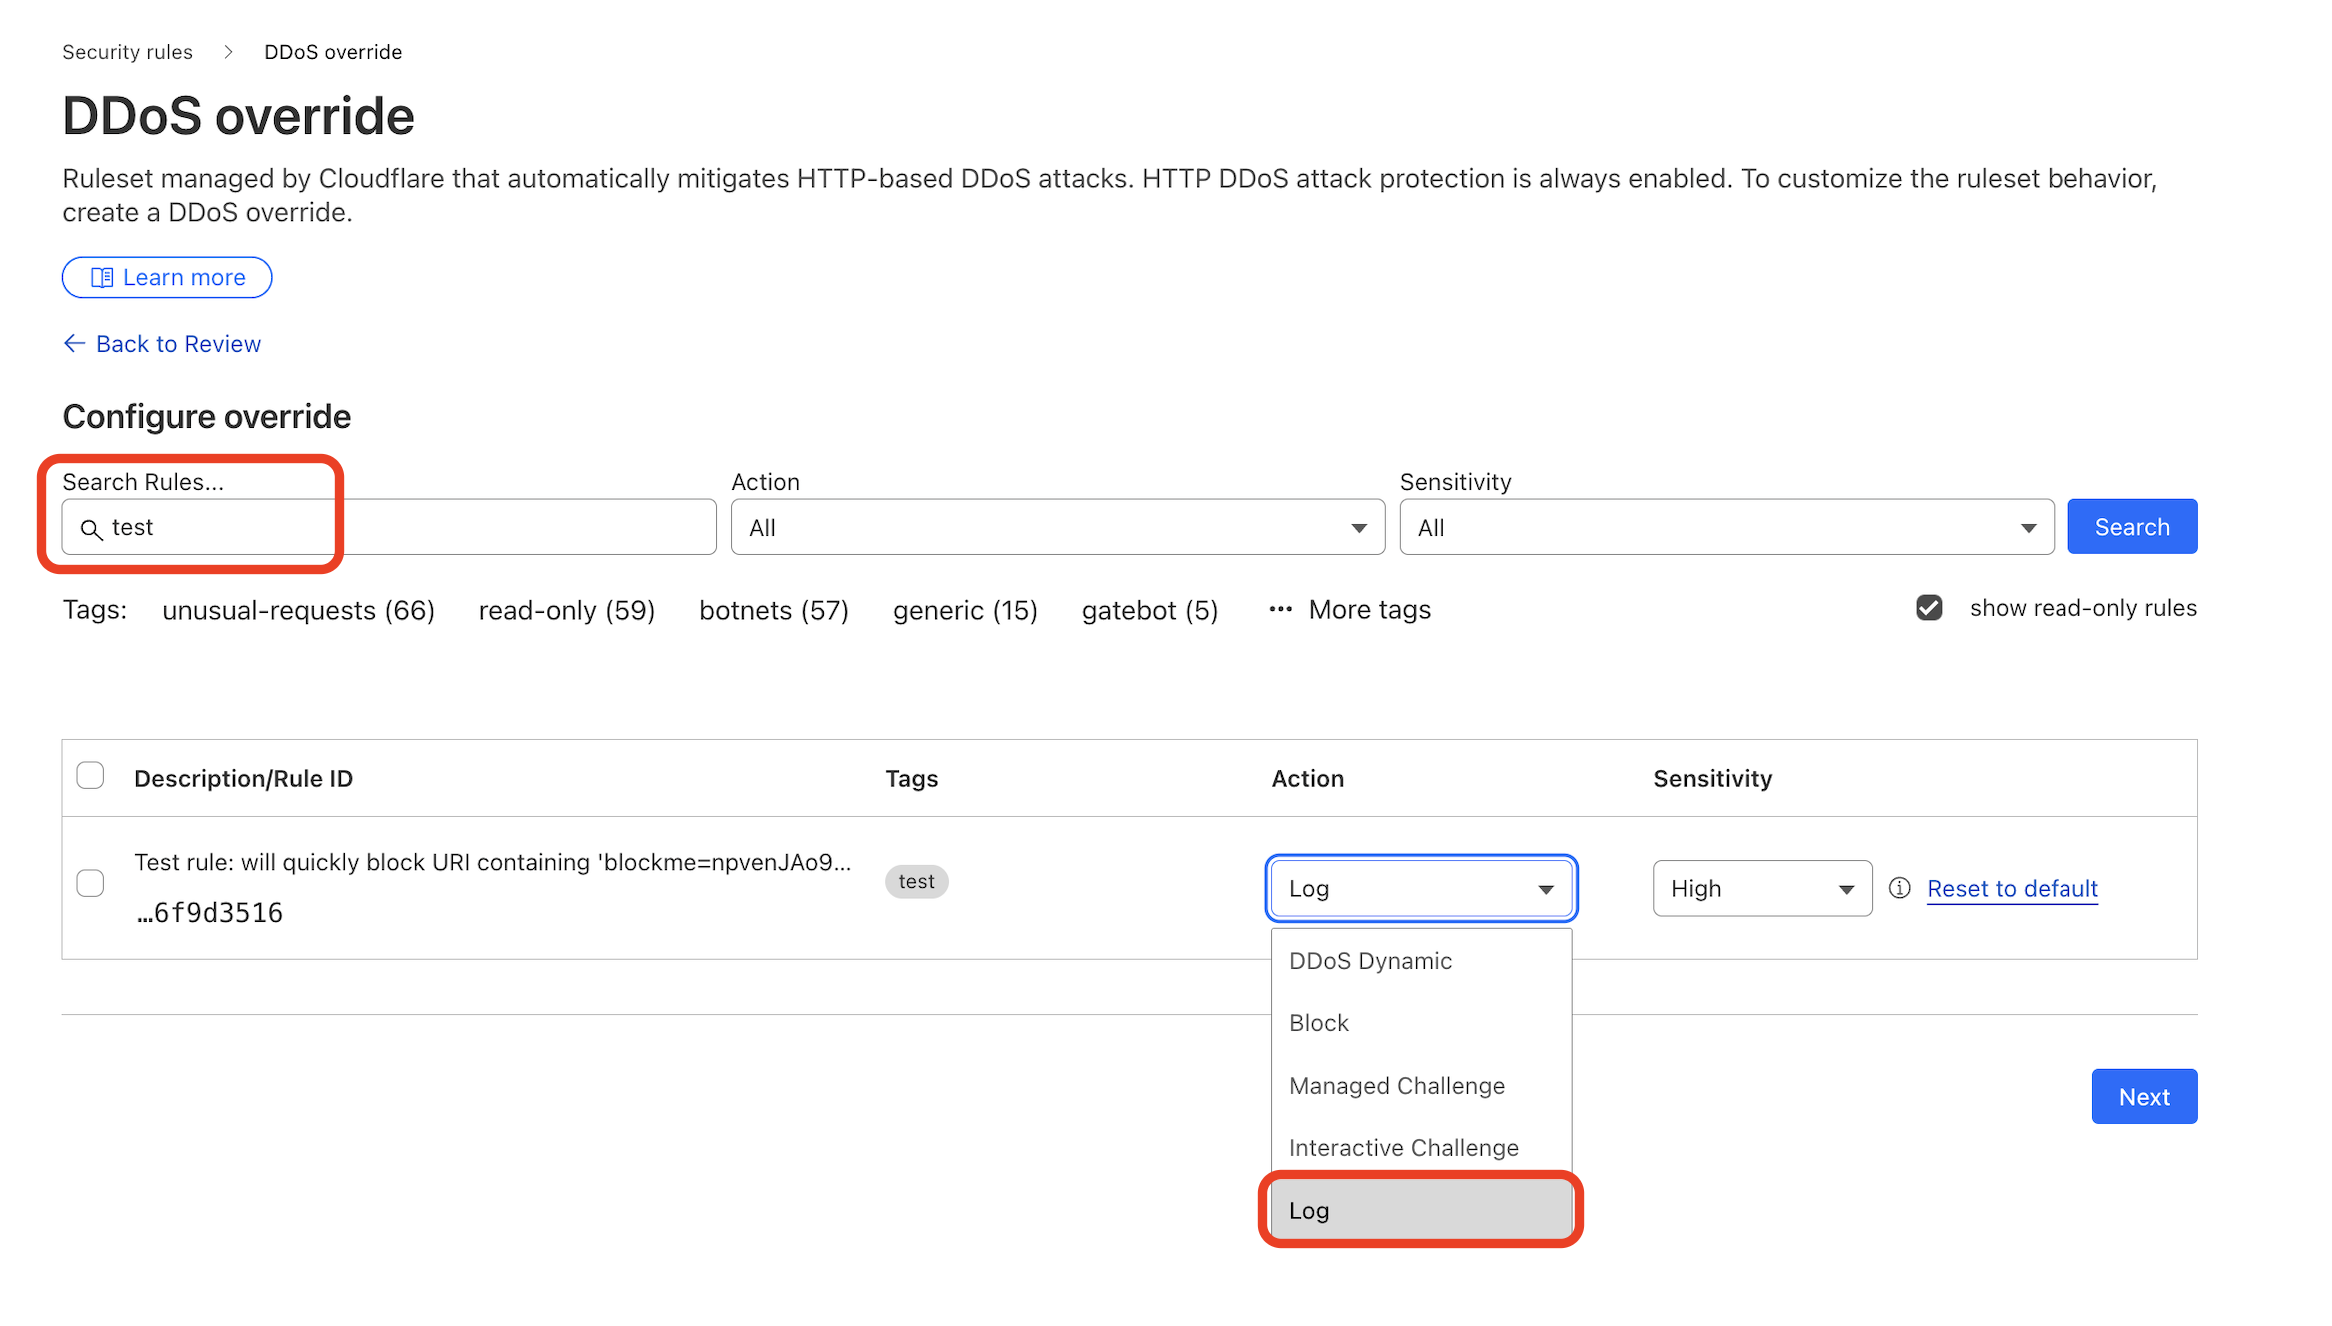
-
Now, repeat steps 1 to 4. This time, you’ll notice that the action taken is “log” instead of a block.
Key Takeaway
- Cloudflare automatically handles L3/L4 DDoS at the network edge — no setup required.
- For HTTP floods (L7), you can create, customize, and override rules to balance strong protection with a smooth user experience.
[Need to confirm the link details]
📖 Want to dive deeper?
- Managed Rulesets for DDoS → Learn how Cloudflare applies preconfigured DDoS rulesets at the HTTP layer and how you can override them.
- Advanced DDoS Systems → A deeper look at Cloudflare’s autonomous edge systems that detect and mitigate sophisticated volumetric attacks in real time.