Custom rules
Custom Rules let you create your own security logic using Cloudflare’s Rules language.
Instead of relying only on preconfigured managed rules, you can define exact match conditions for your application traffic.
Common use cases include:
- Blocking or challenging requests from specific IPs, countries, or ASNs.
- Allowing trusted partners or internal traffic while applying stricter controls to others.
- Adding exceptions to managed rules so legitimate requests are not blocked.
- Using advanced signals such as Bot Score or WAF Attack Score to make smarter decisions.
✅ With Custom Rules, you get granular, flexible control to adapt security policies to your application’s unique needs.
Task
In this session, we will configure Custom Rules to handle different types of traffic. The goal is to see how flexible rules can be when controlling access to your application.
We will create rules for:
- Region Allow – Only allow requests from a specific country/region while blocking others.
- Block IP – Block traffic from a given IP address or small IP range.
- User Agent filter – Block requests coming from a suspicious or unwanted user agent string.
- /config.php protection – Deny access to sensitive paths (such as
/config.php) so they cannot be reached directly from the internet.
By the end of this exercise, you will understand how to build targeted security rules to protect your application without affecting legitimate traffic.
Create custom rule
In this workshop, in order to prevent the previous rule to cause unnecessary result, after you do the test for each rule, you can disable the rule that had been created and proceed to the next rules
Block by Region
-
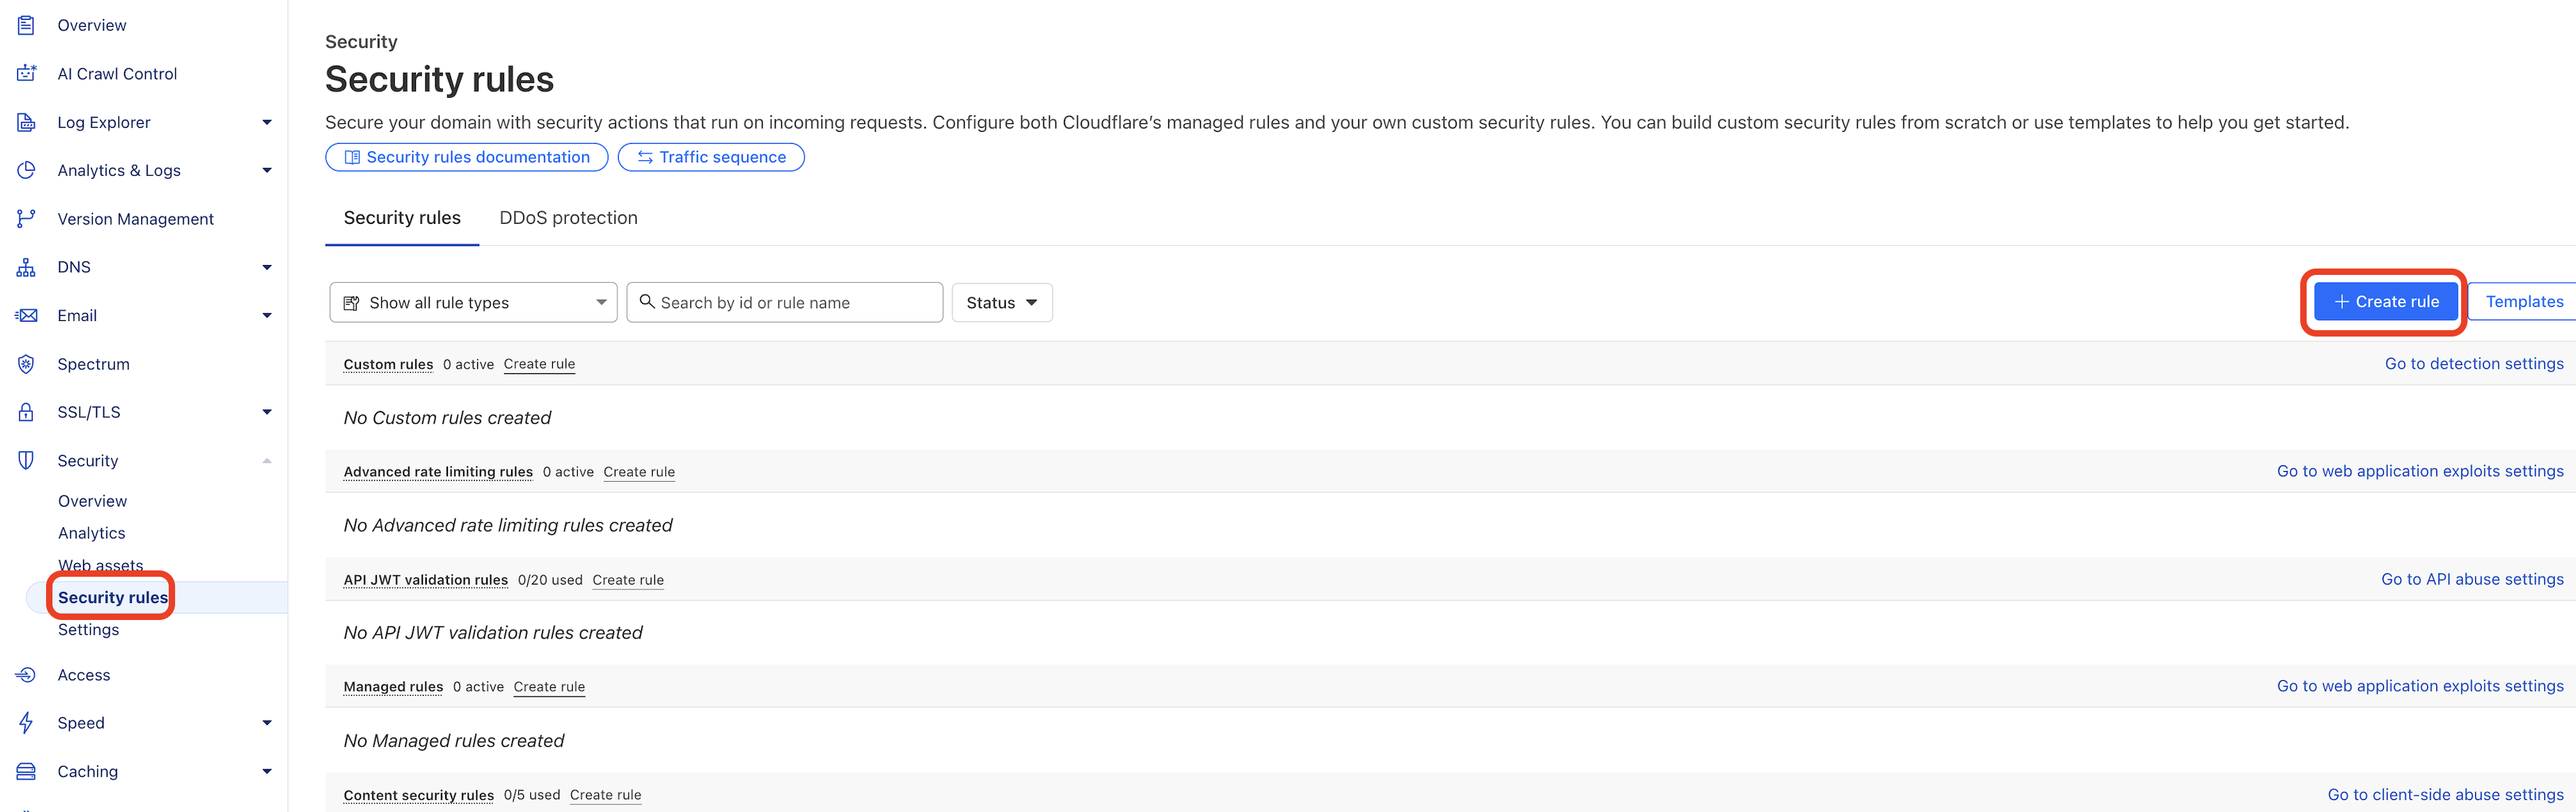
In the Cloudflare Dashboard go to Security > Security rules > Create rules
-
Rule Name : Block Every Country Except Singapore
- Field:
Country - Operator:
does not equal - Value:
Singapore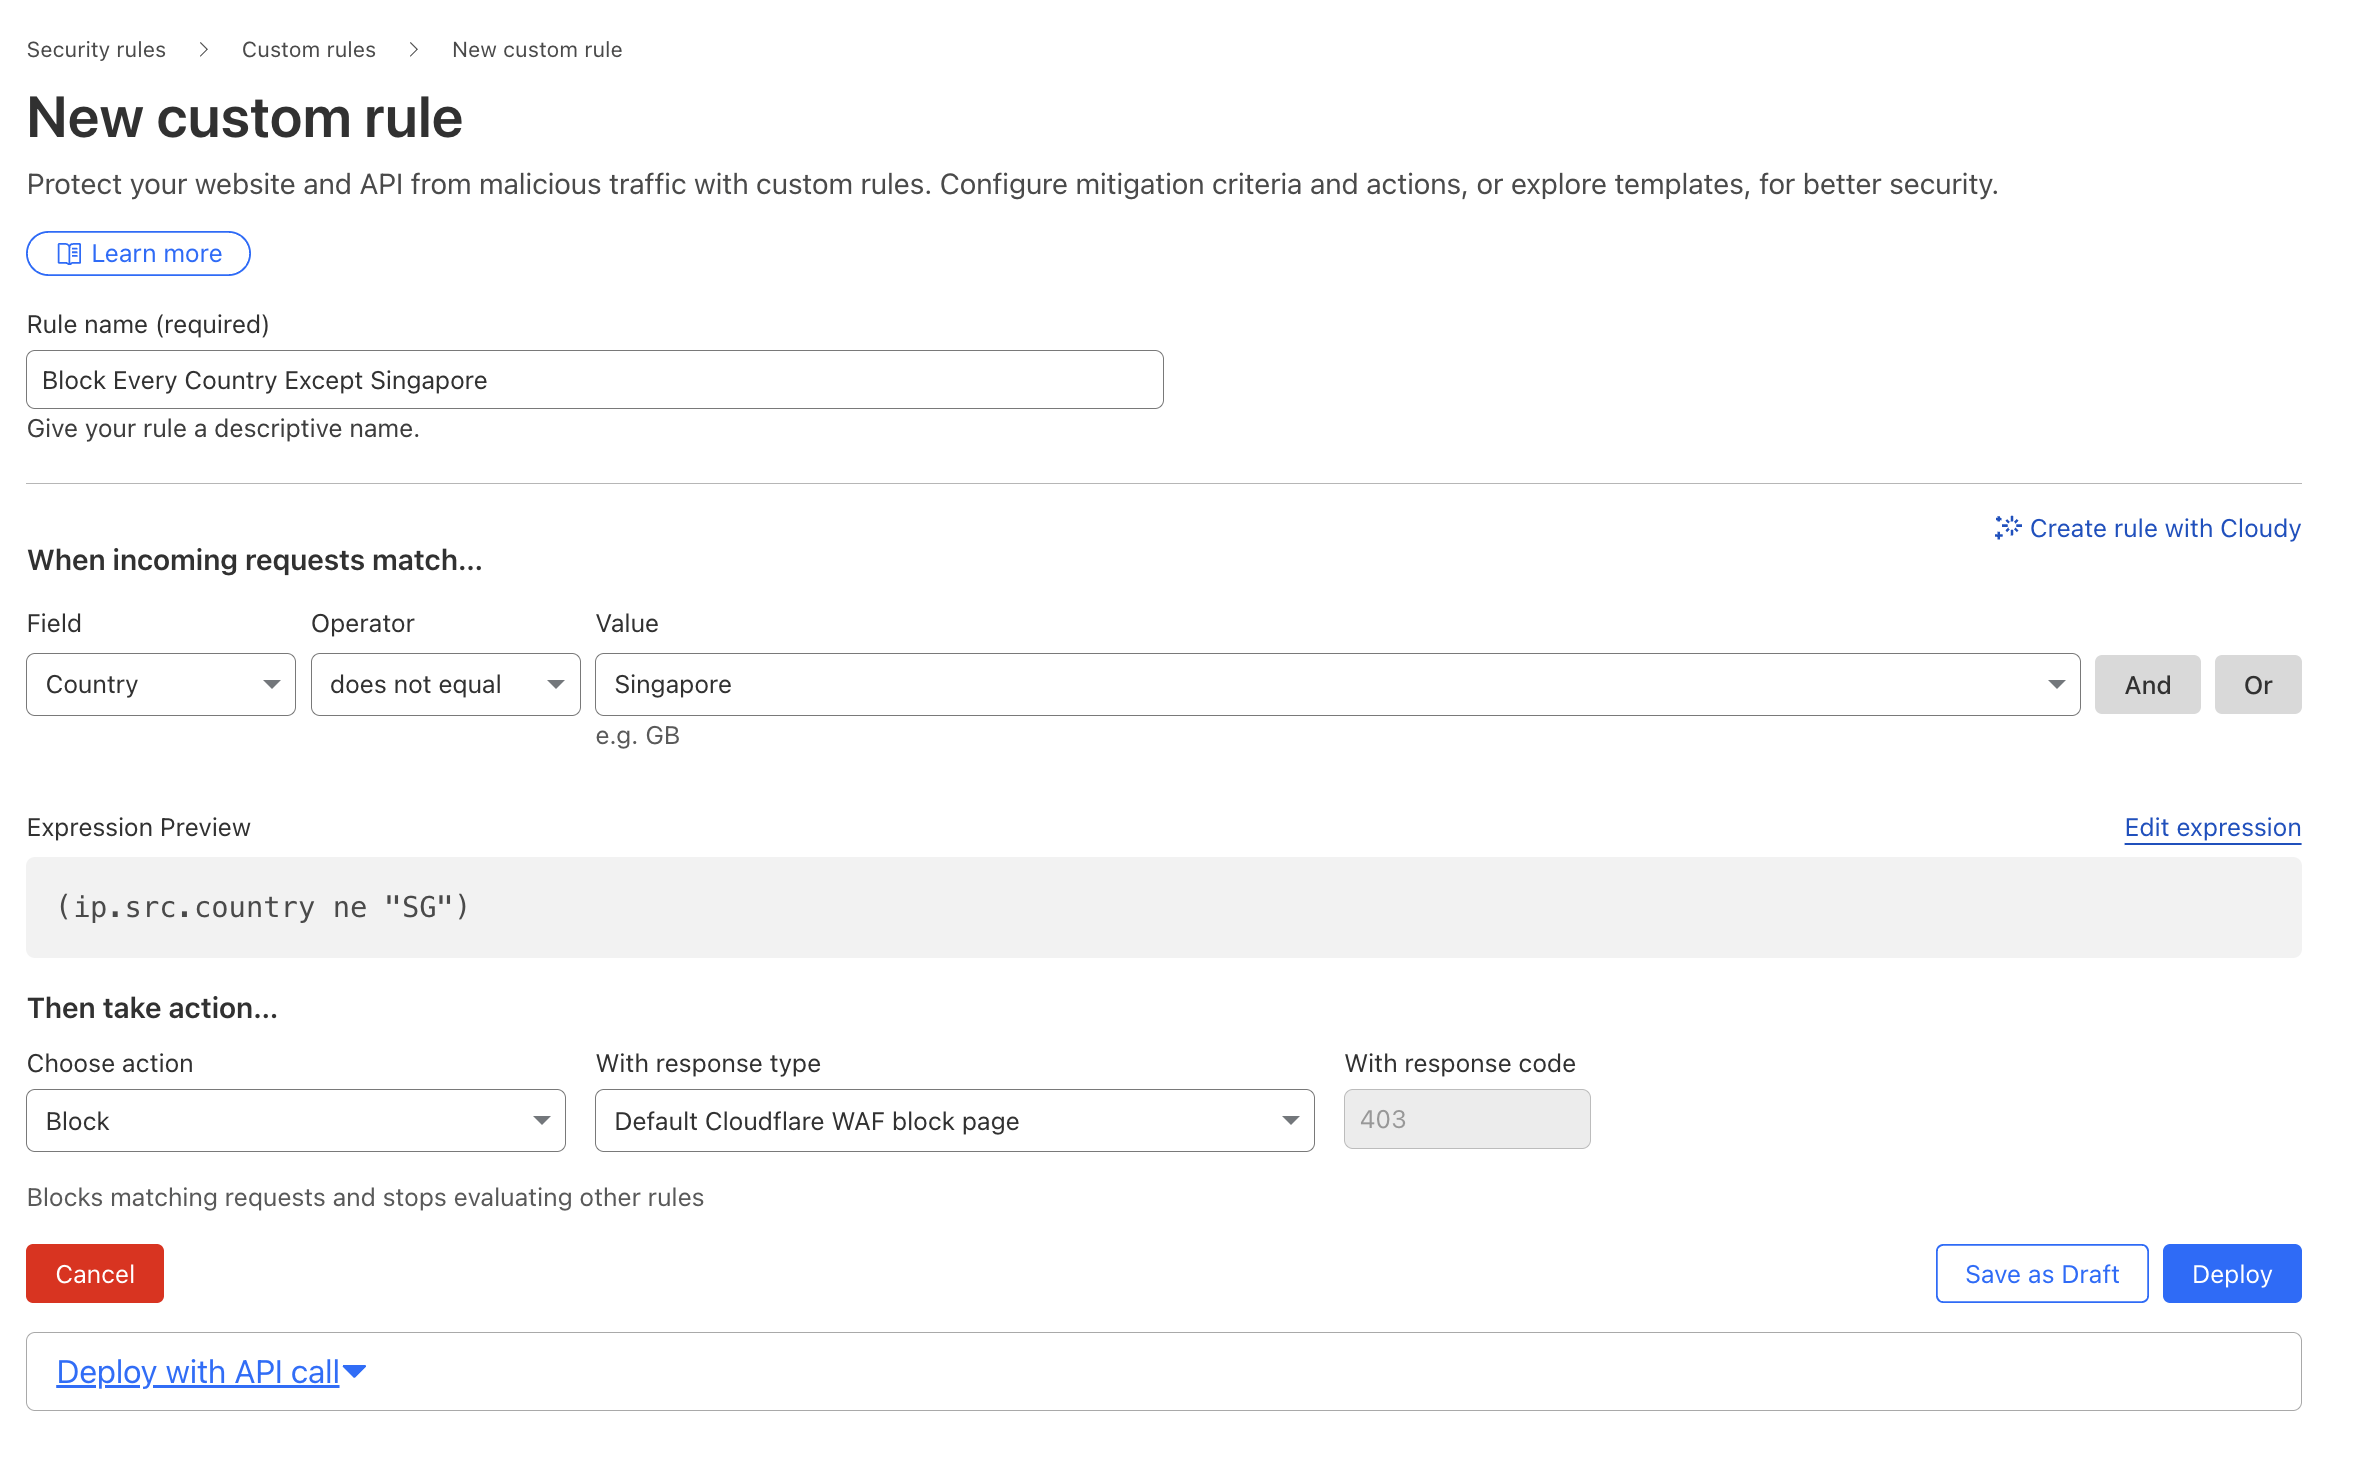
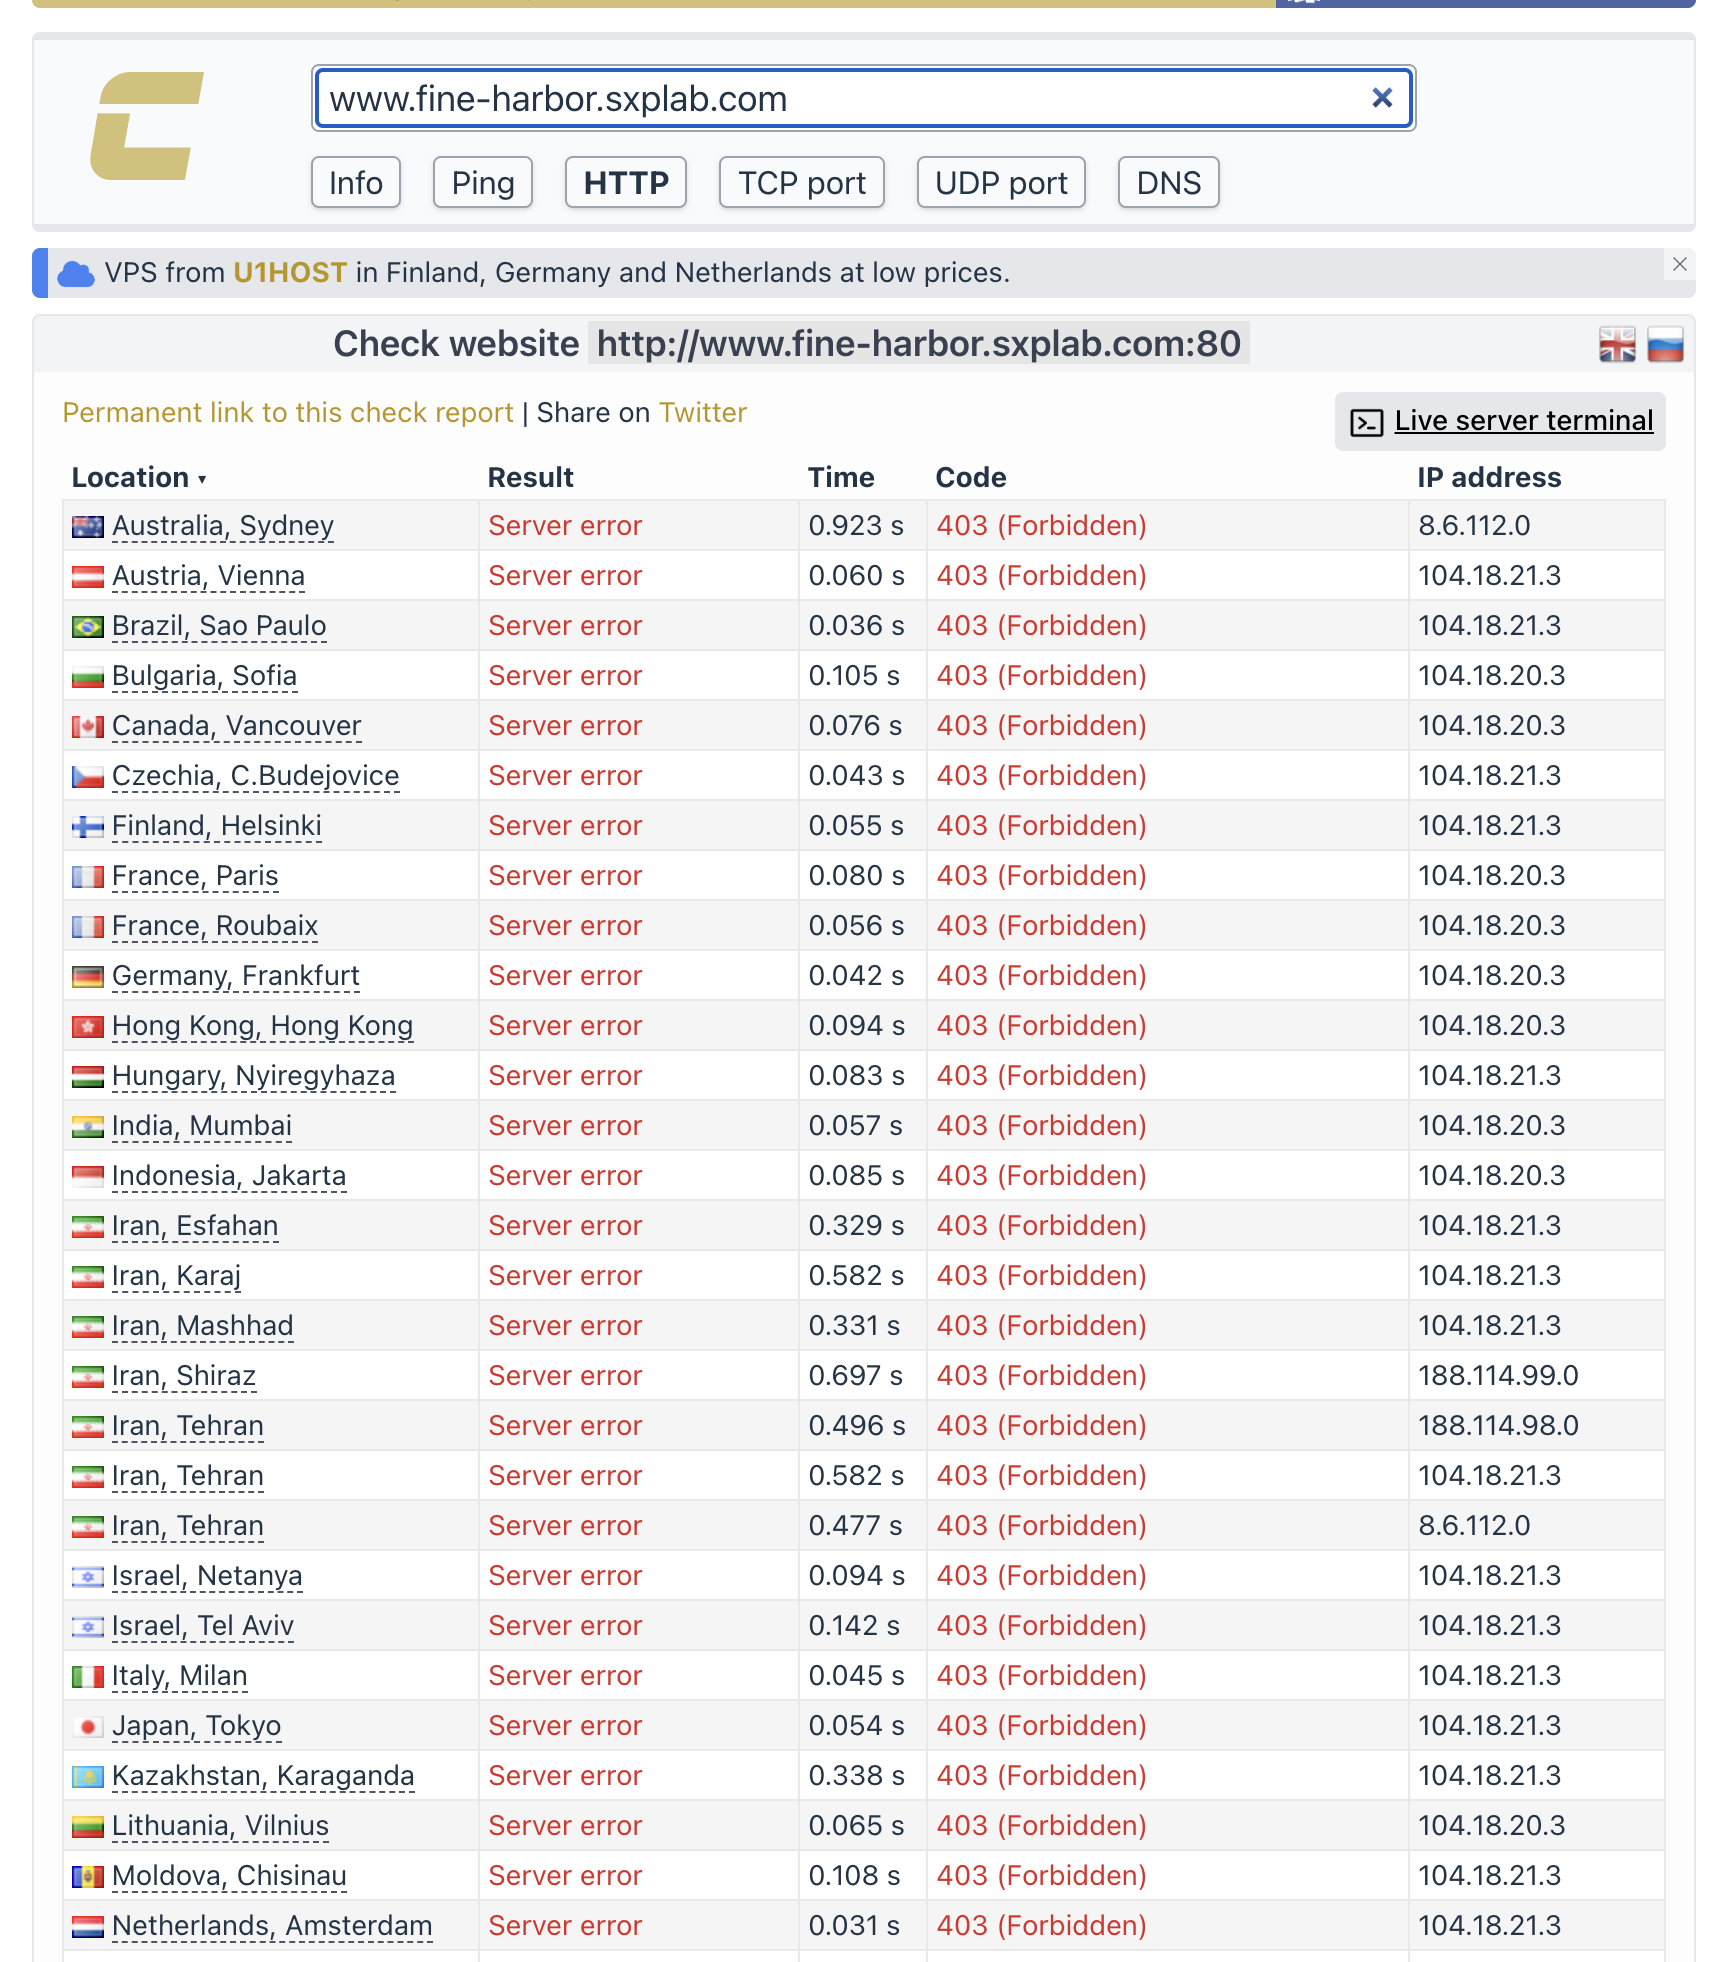
- Click Deploy, and test your domain to see if it can successfully be visited from other countries. Use https://check-host.net/check-http tool
Whitelist IP
-
In the Cloudflare Dashboard go to Security > Security rules > Create rules
-
Create a Whitelist Rule
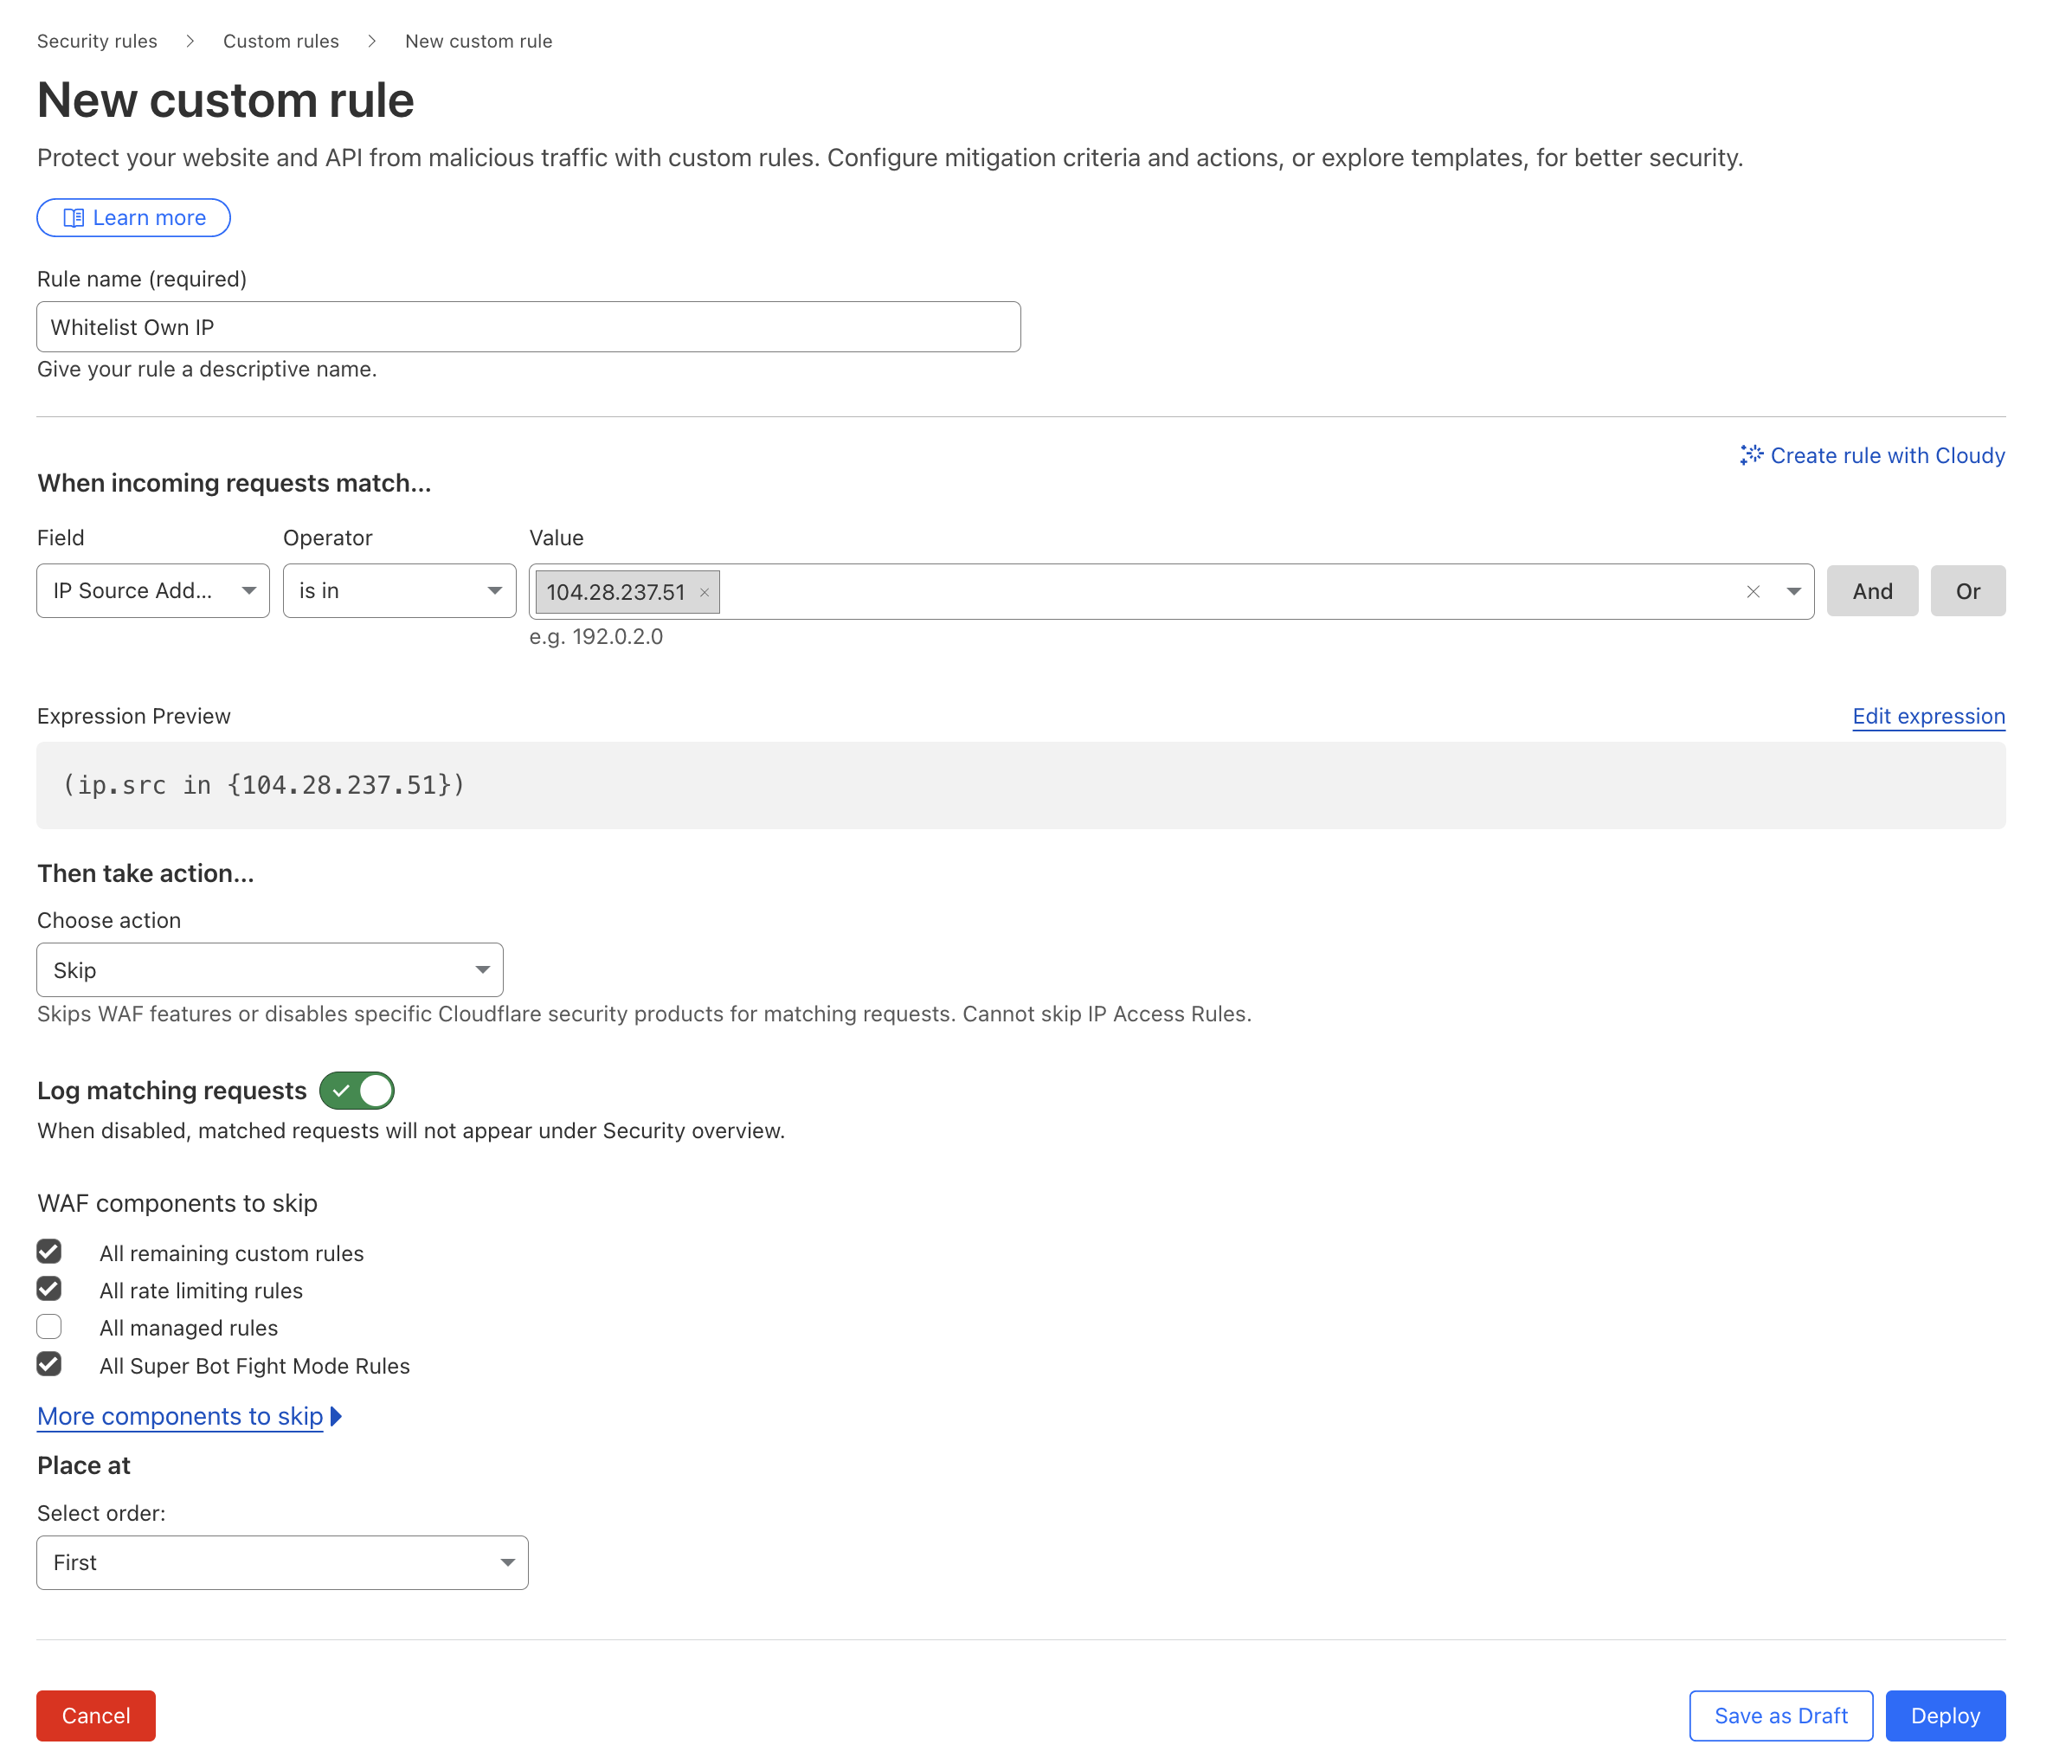
- Rule Name:
Whitelist Own IP - Field:
IP Source Address - Operator:
is in - Value:
Your IP(your own IPv4 and IPv6, you can use https://whatismyipaddress.com/) - Action:
Skip - Order:
First(It has to be first to take effect as the highest priority rules) - When done, click Deploy
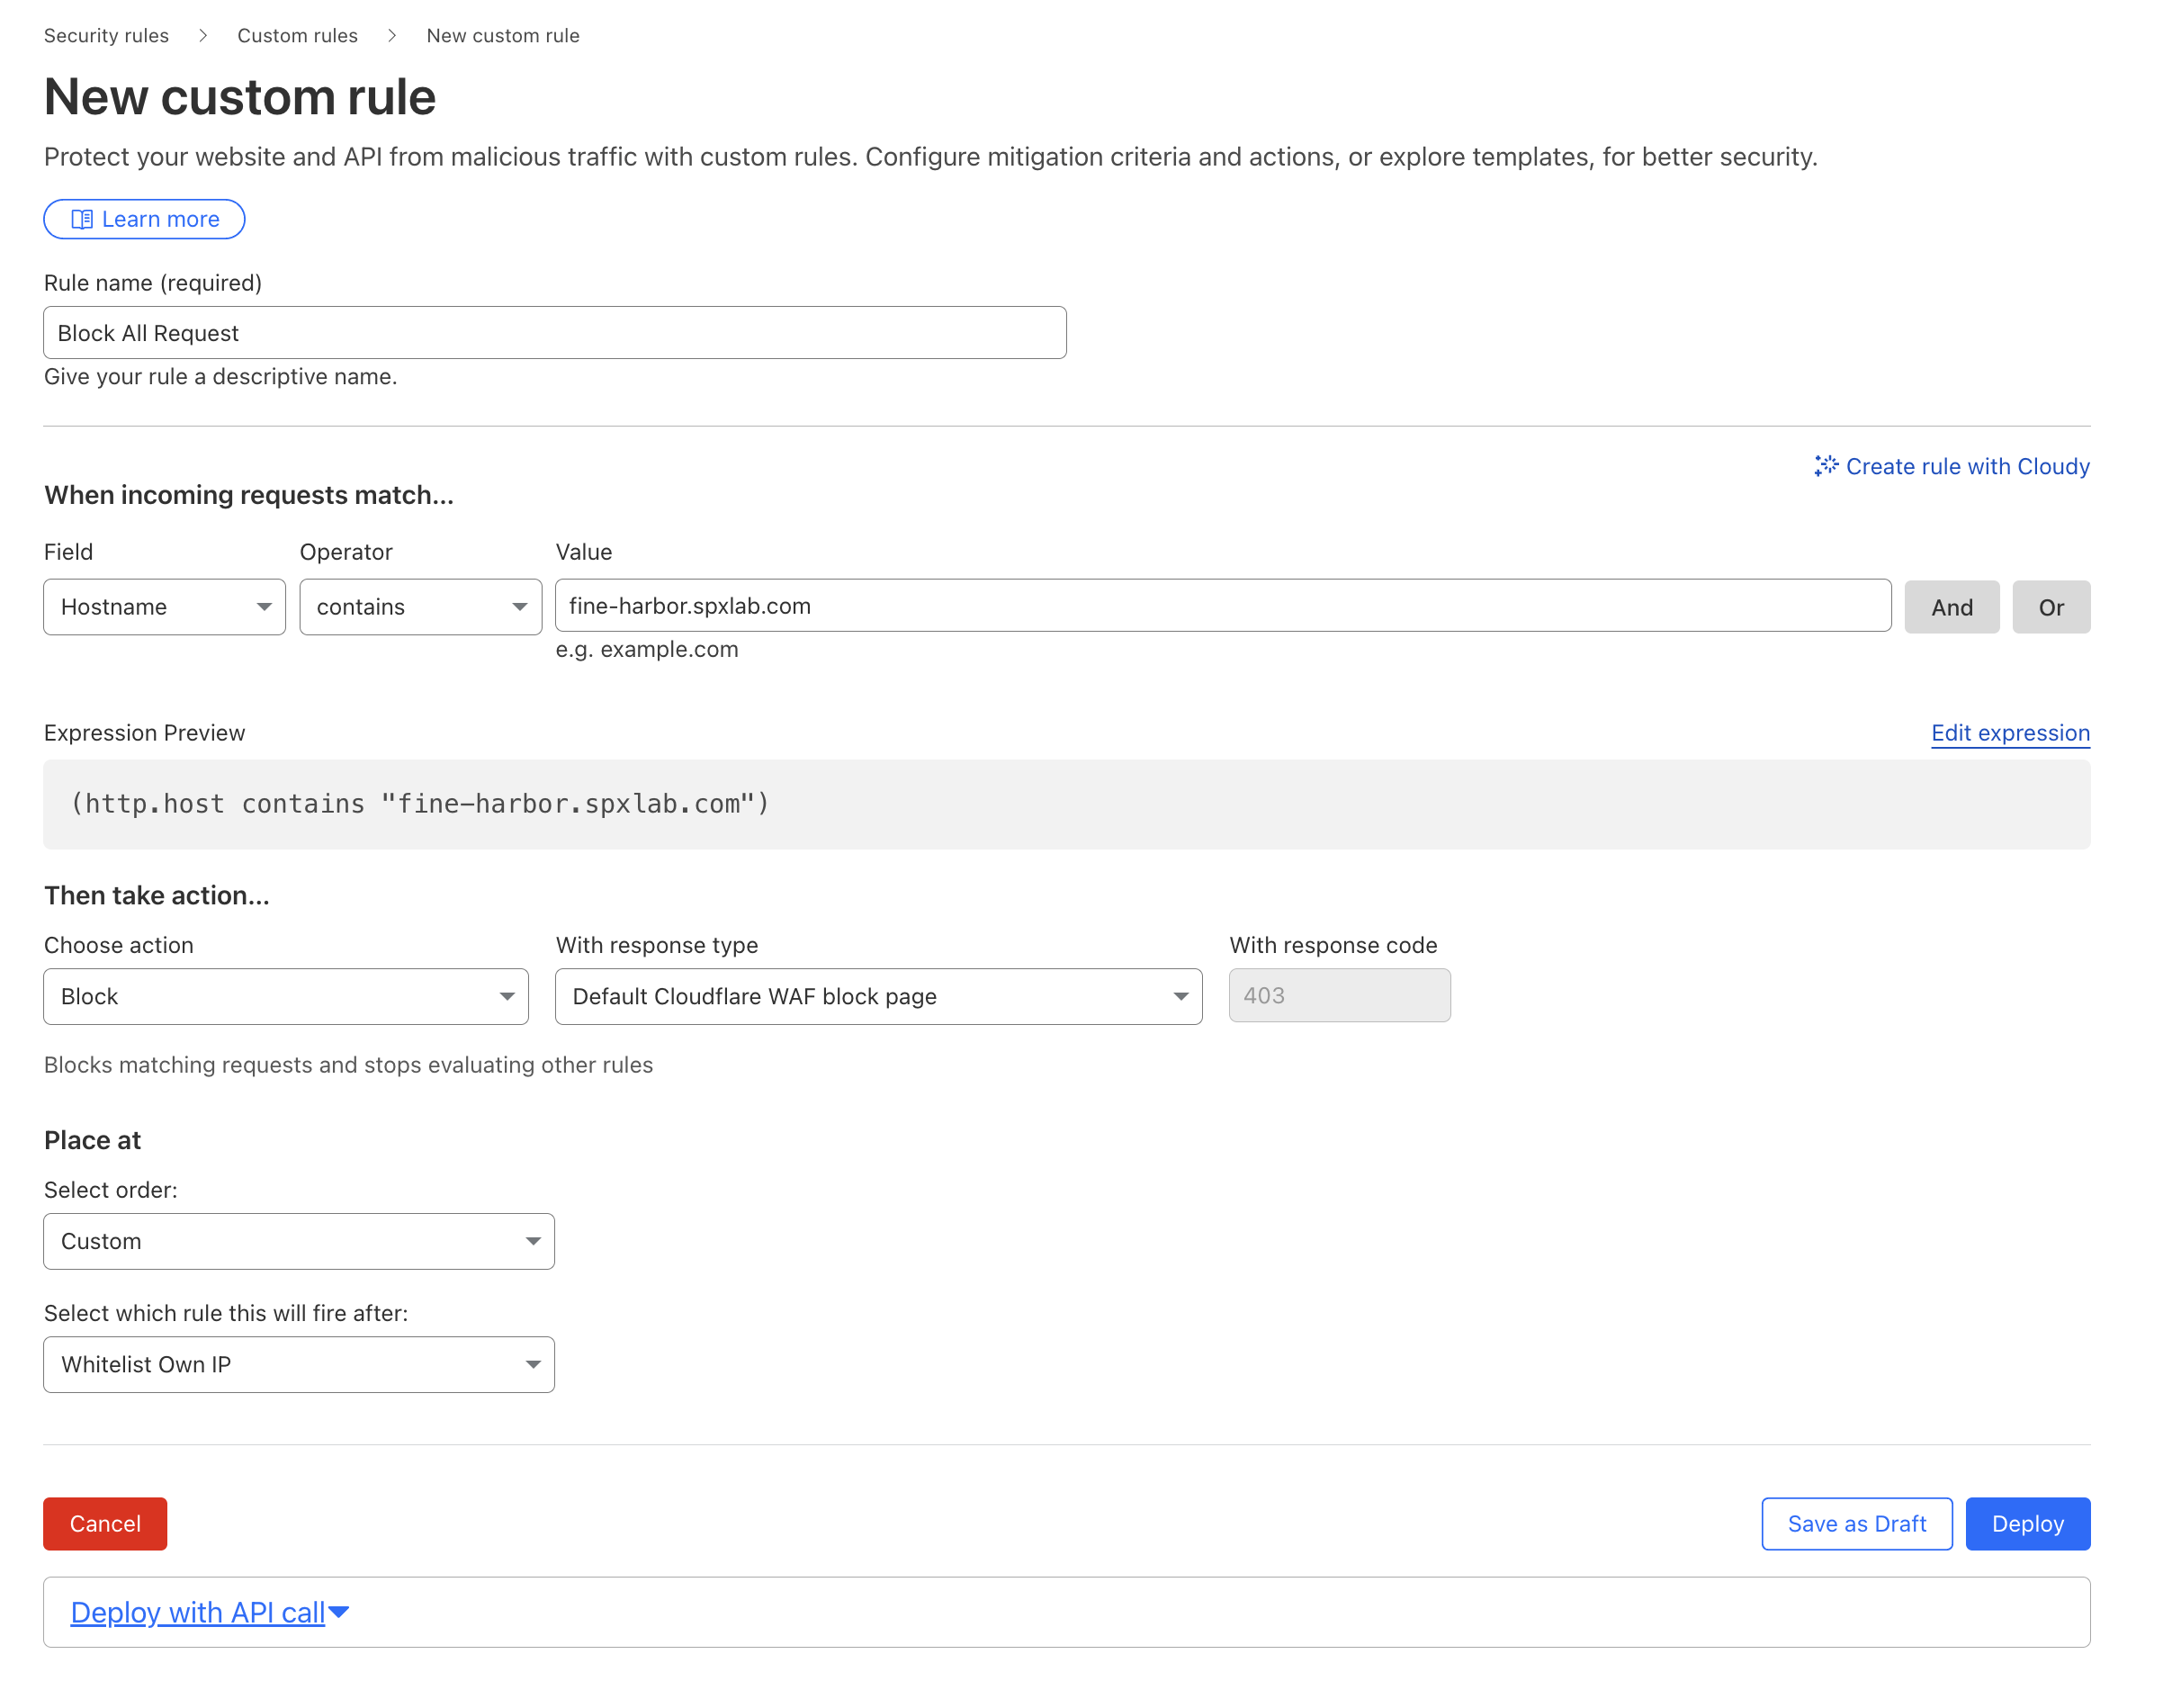
- Create a block rule for every other user
- Rule Name:
Block All Request - Field:
Hostname - Operator:
contains - Value:
yourdomain - Choose action:
Block - Select order:
custom - Select which rule this will fire after:
Whitelist Own IP - When done, click Deploy
- To test this out, you can disable the
Whitelist Own IPrule, and visit your domain. It probably show that you are blocked. Enable theWhitelist Own IPrule on the Dashboard and only you can visit the domain again.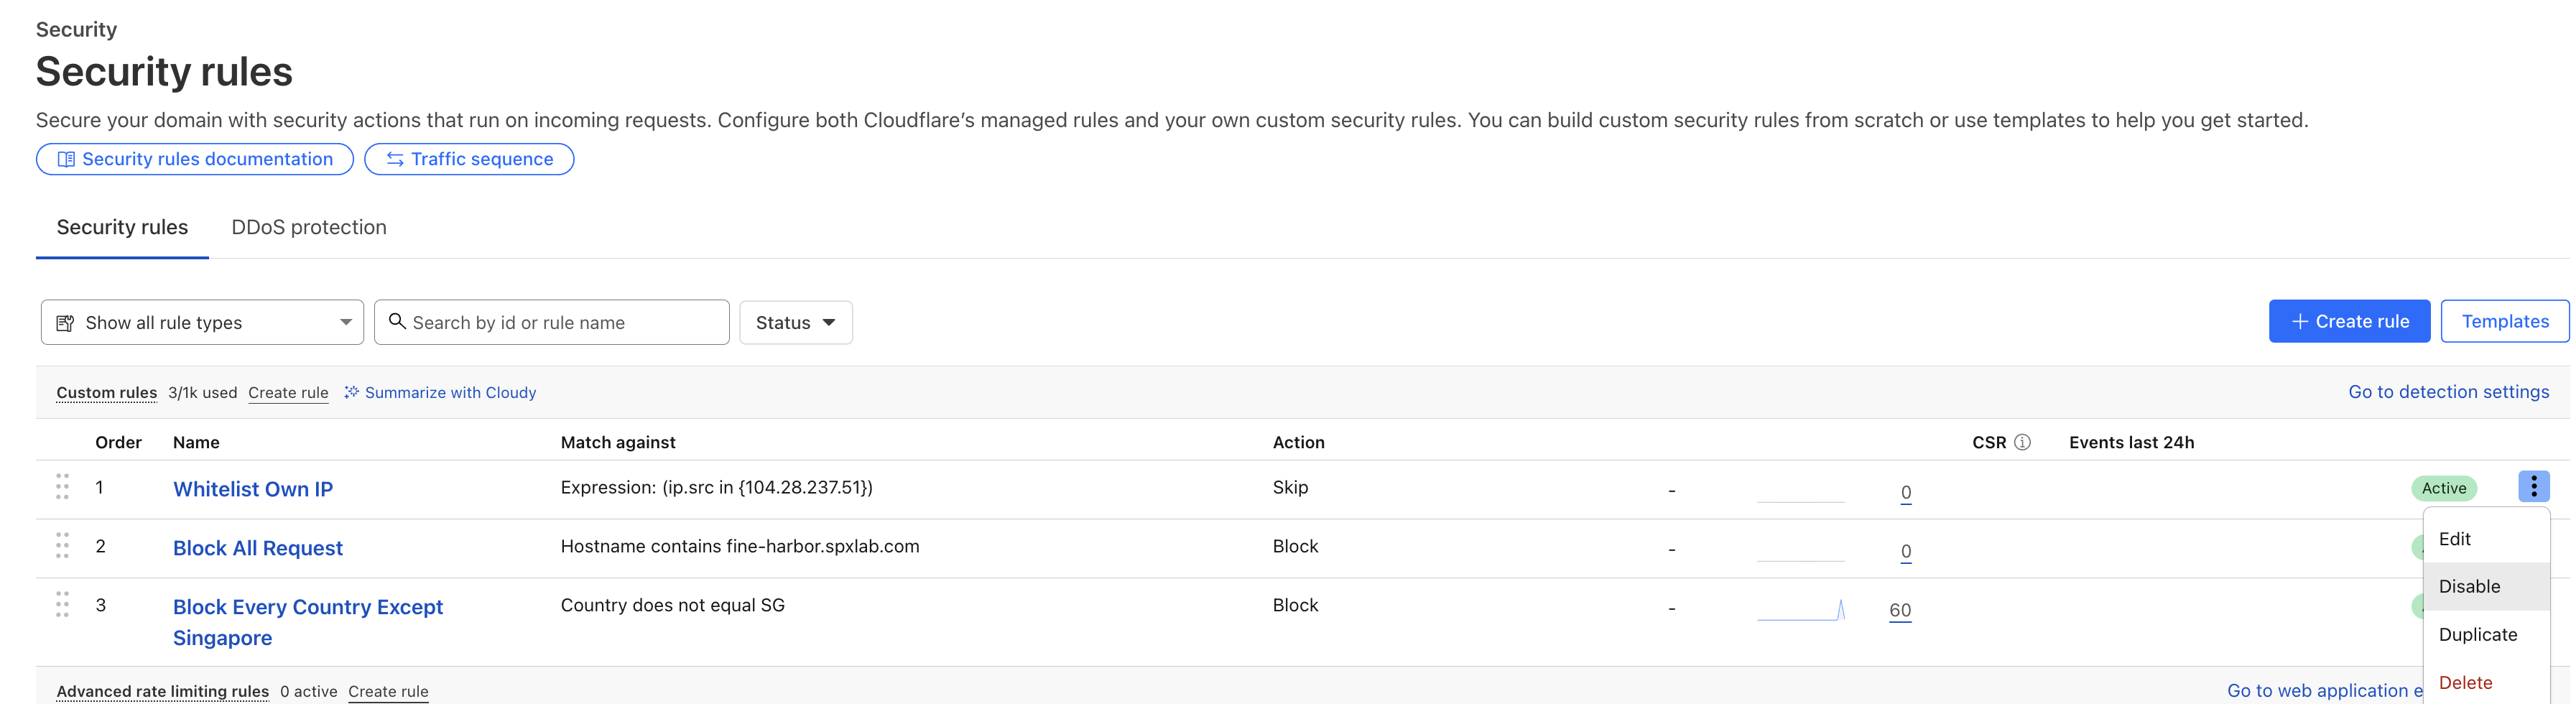
Takenote that in the security rules, Order of the rules matter. The higher the rule locate, the higher the priority. You can easily change the order of the rule by dragging the icon :: next to the rule name
User Agent
-
In the Cloudflare Dashboard go to Security > Security rules > Create rules
-
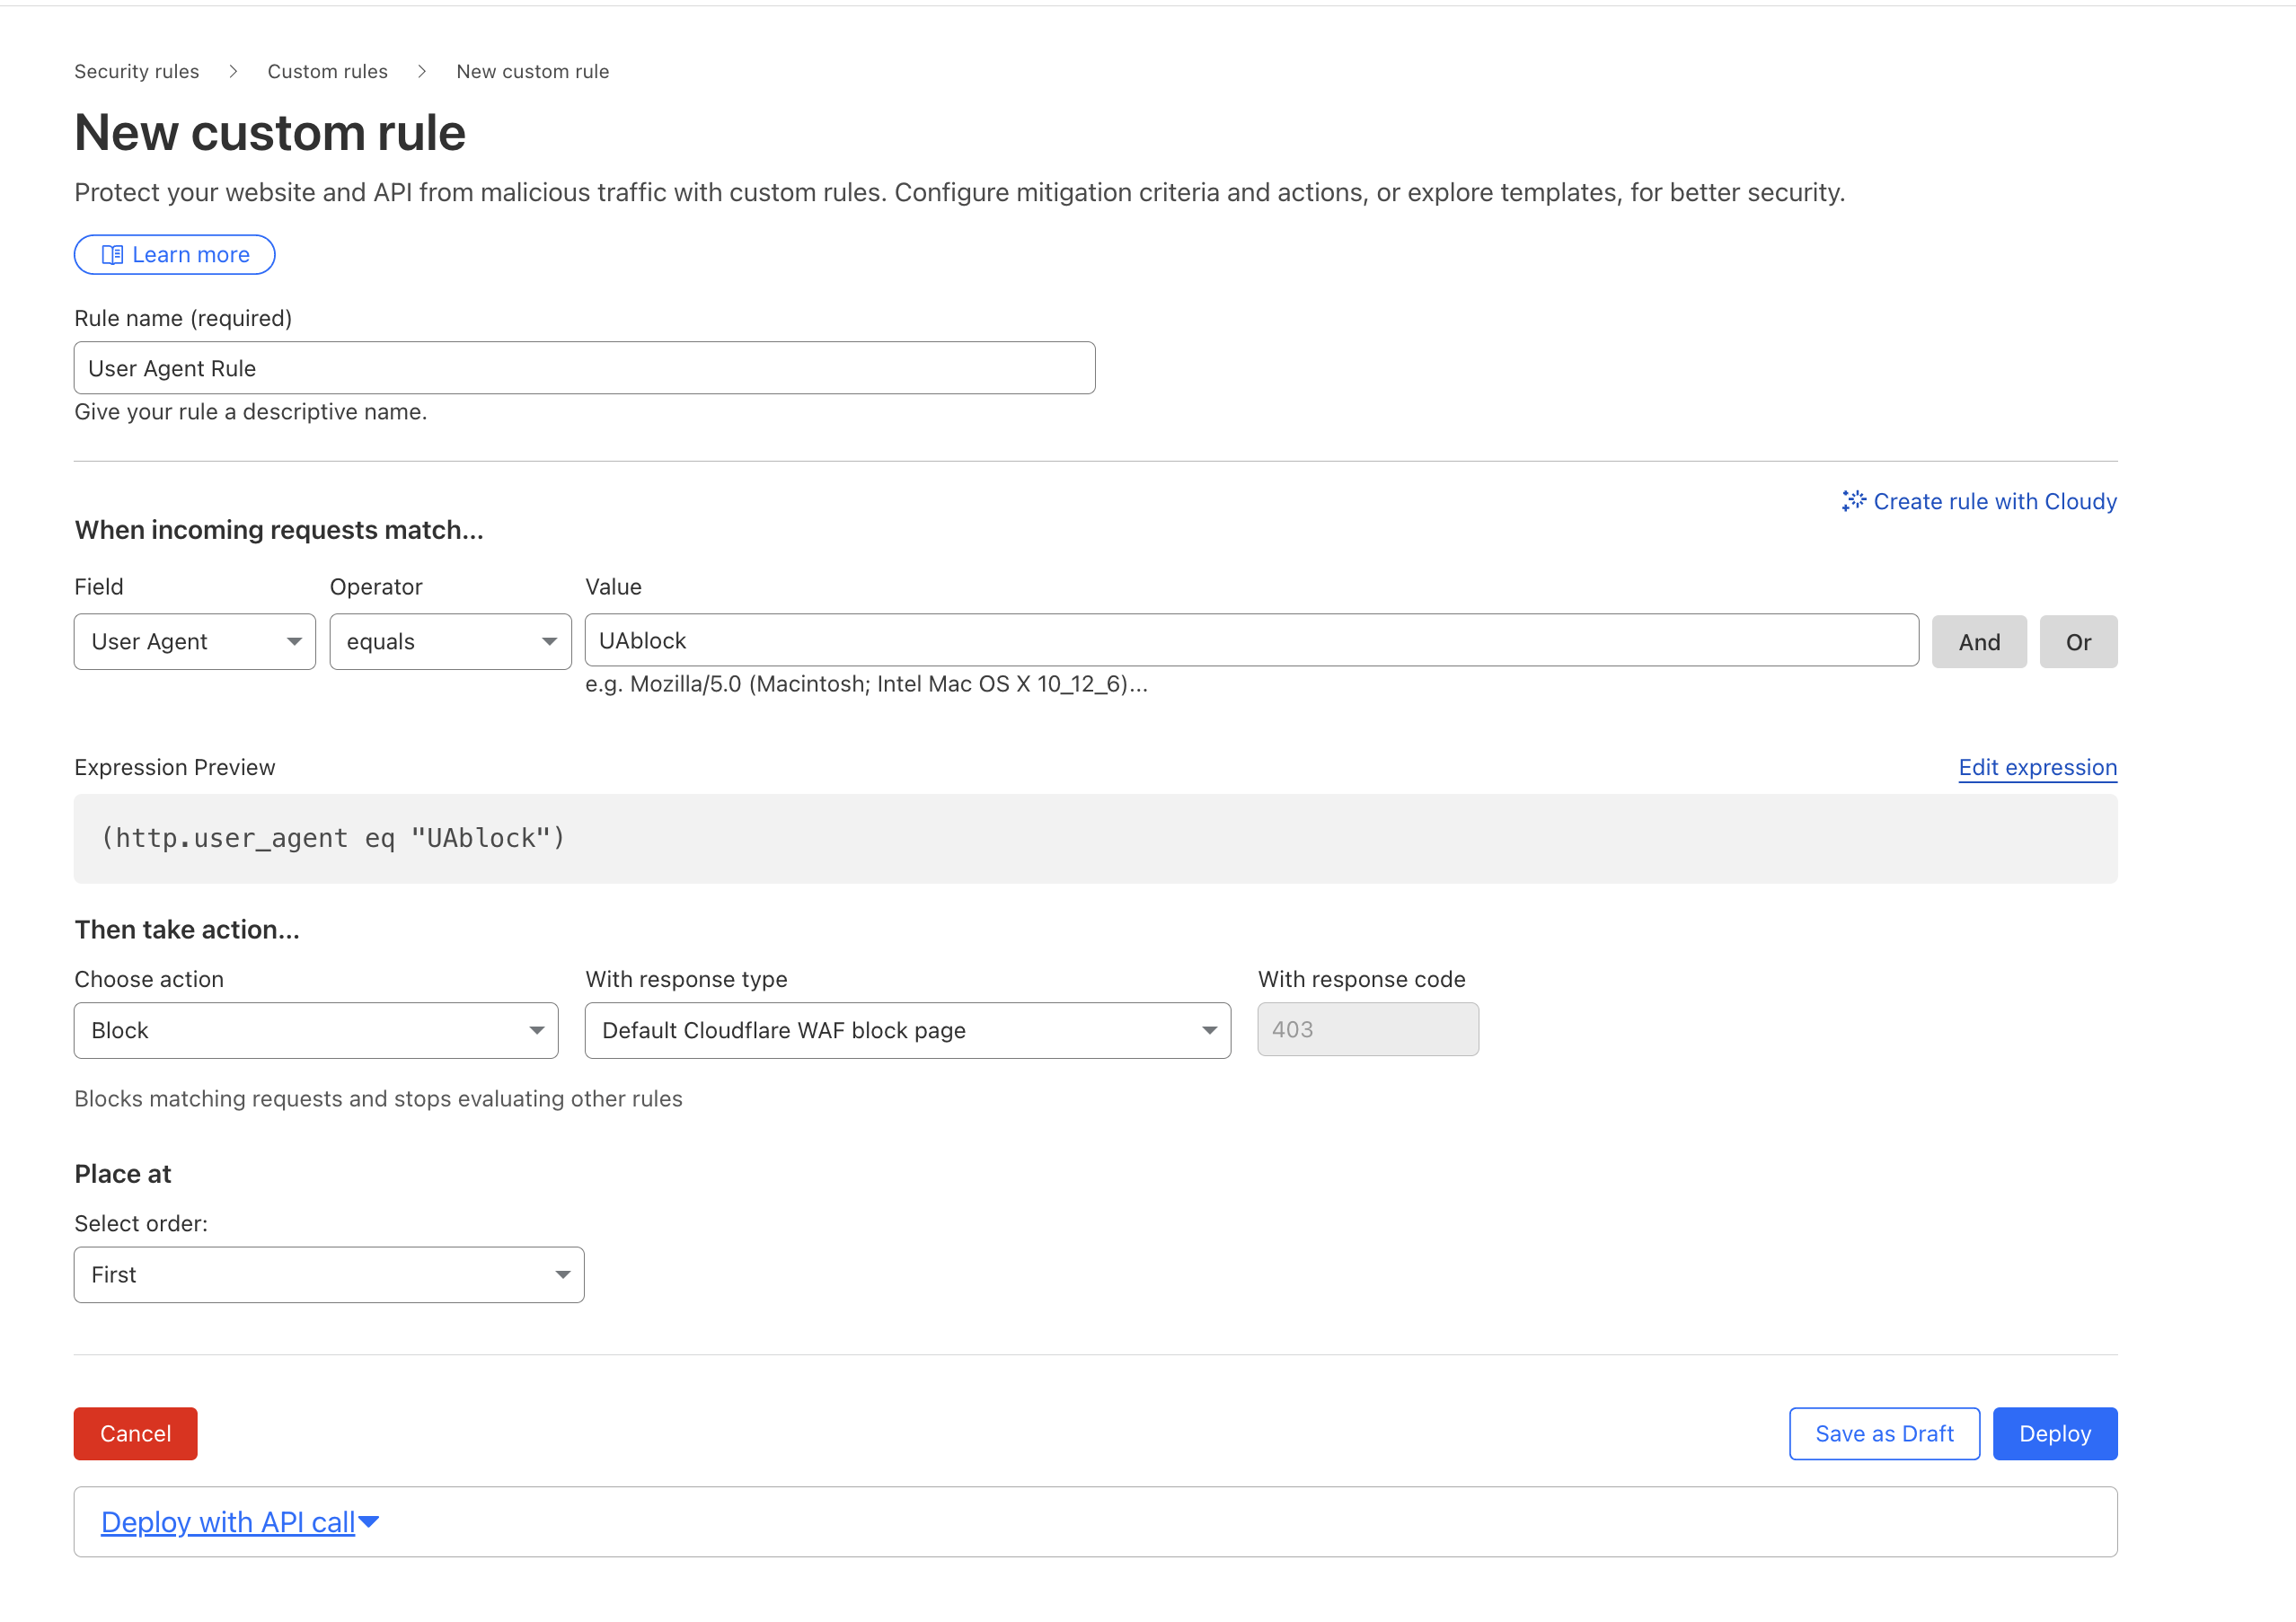
Create a rule to block requests with the User Agent : UAblock
- Rule Name:
User Agent Rule - Field:
User Agent - Operator:
Contains - Value:
UAblock - Choose Action:
Block - Select Order:
First - When done, click Deploy
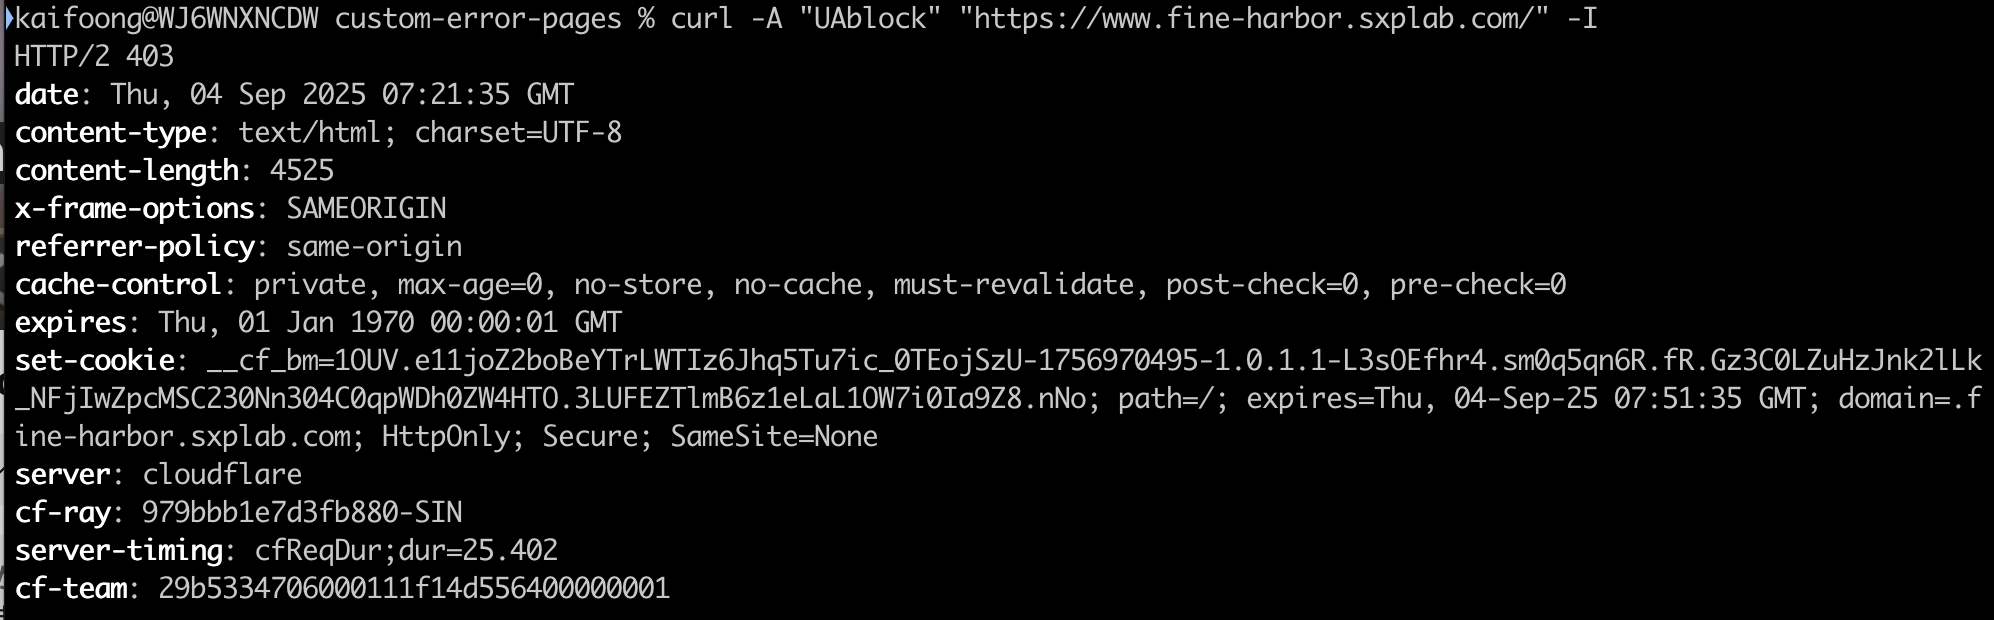
- Run the following command and you may see that the request is blocked (Status Code : 403)
Curl
curl -A "UAblock" https://<yourdomain.spxlab.com> -I
-
Navigate to Security > Analysis > Events, and see if your requests are being blocked
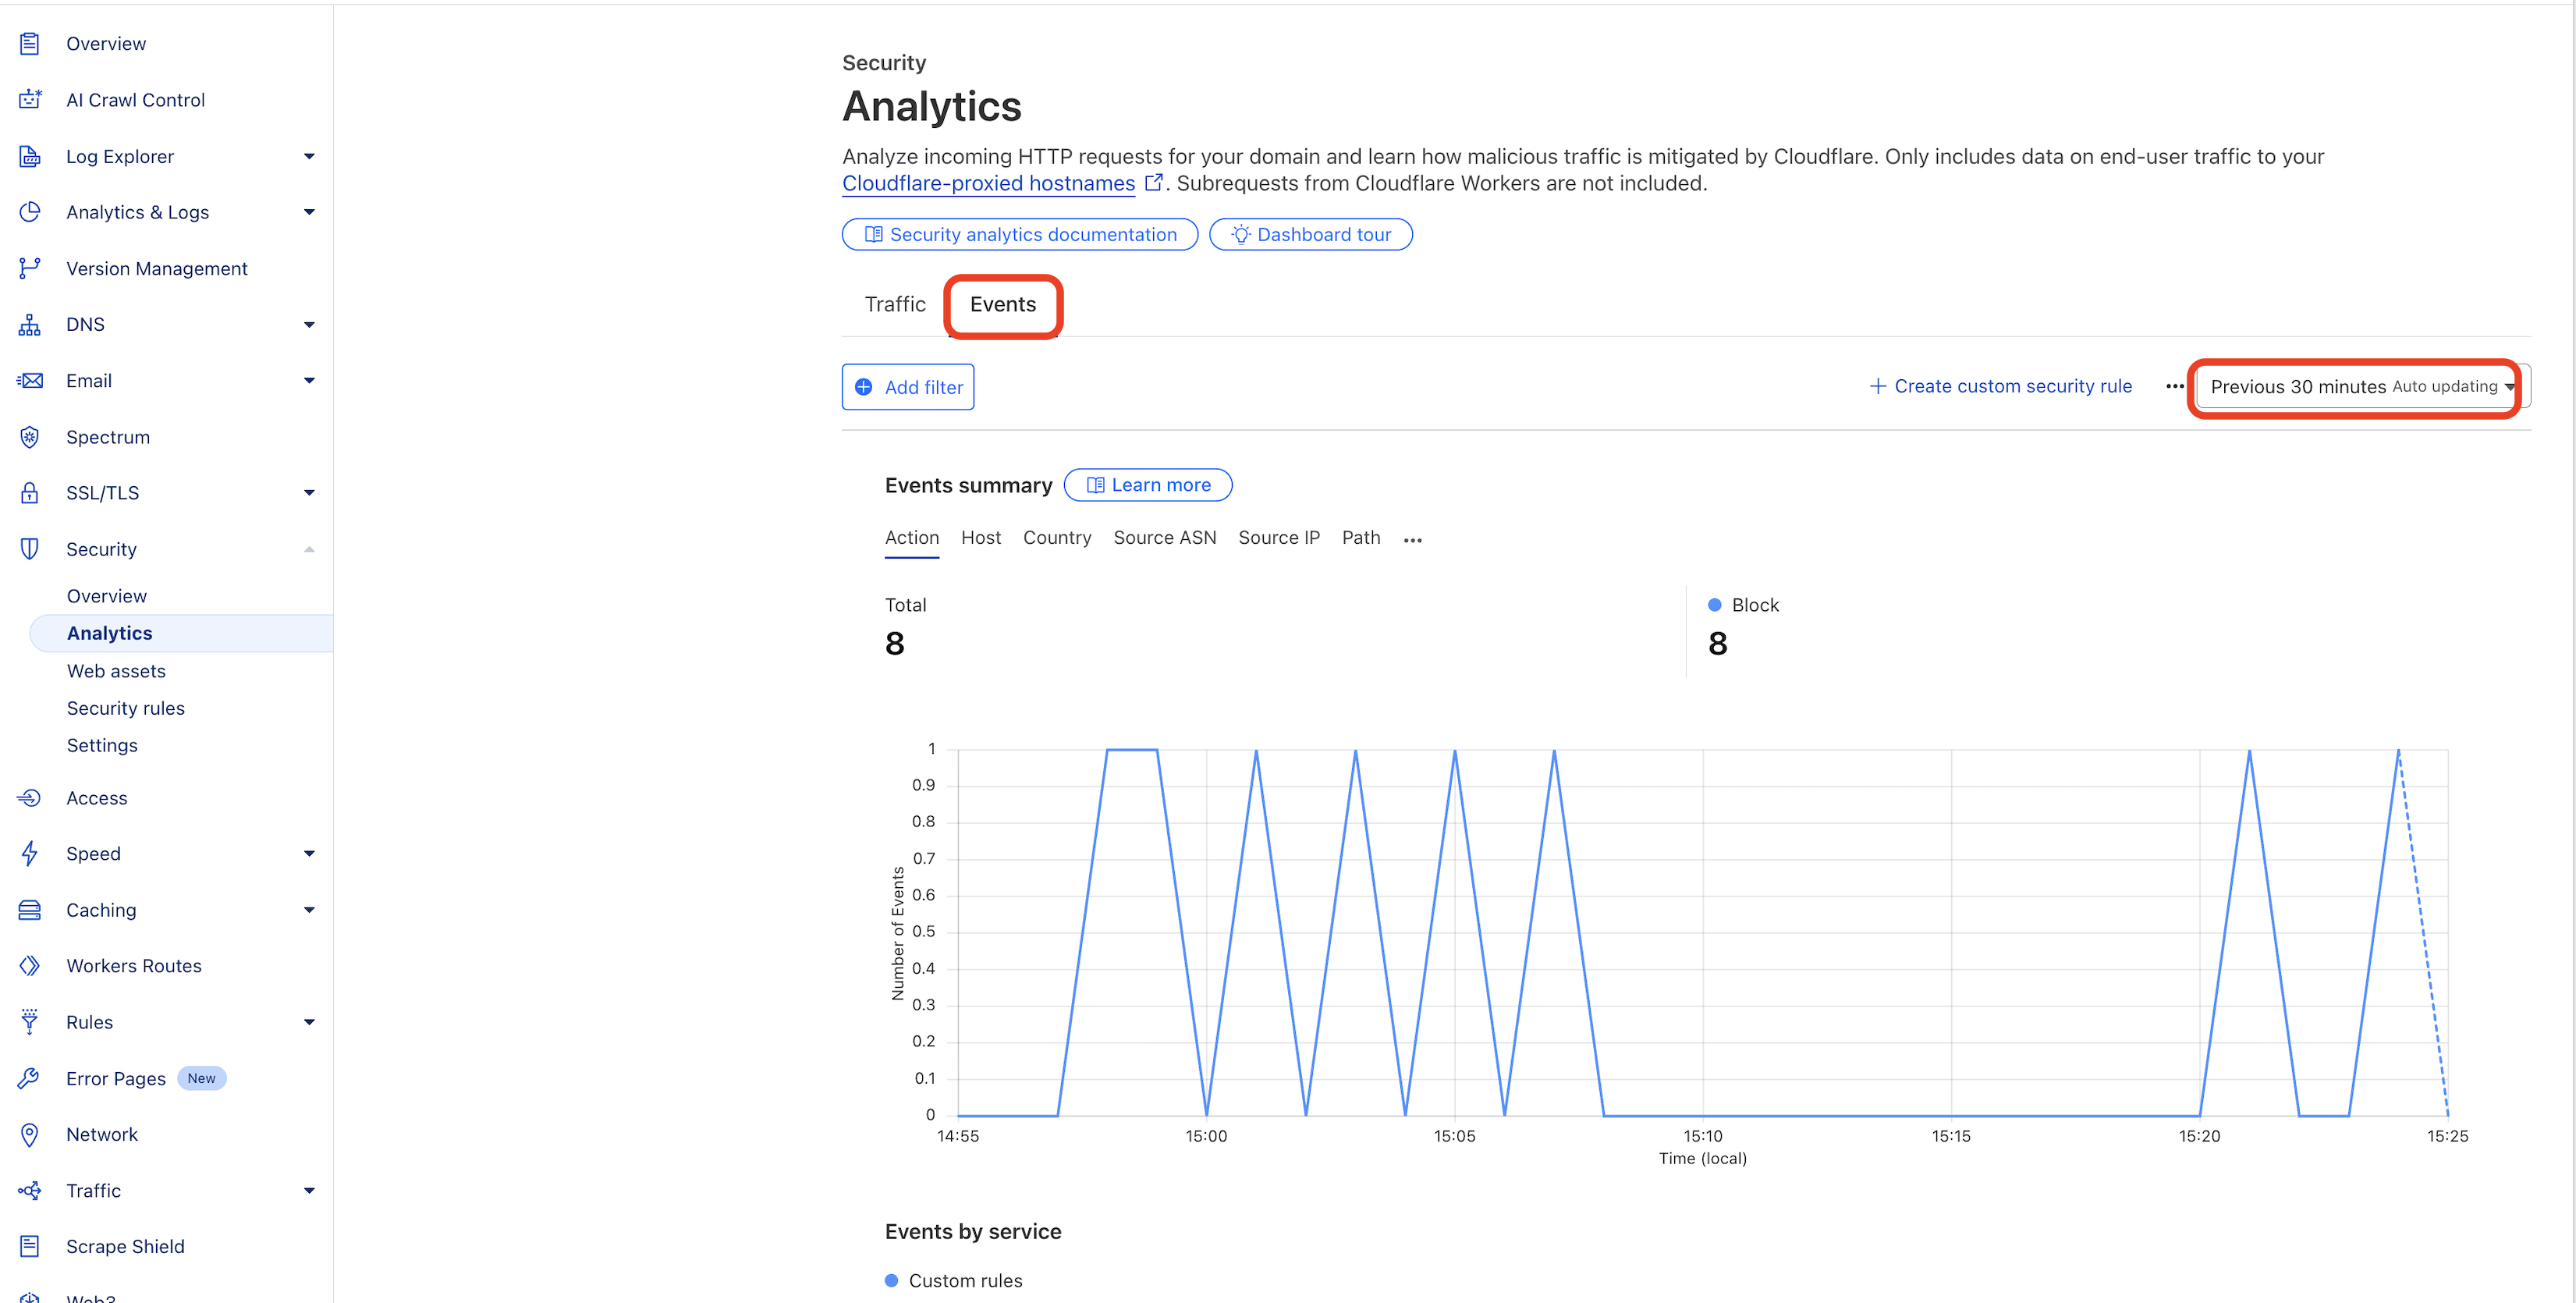
-
Then scroll down to Sample Log and find the corresponding request
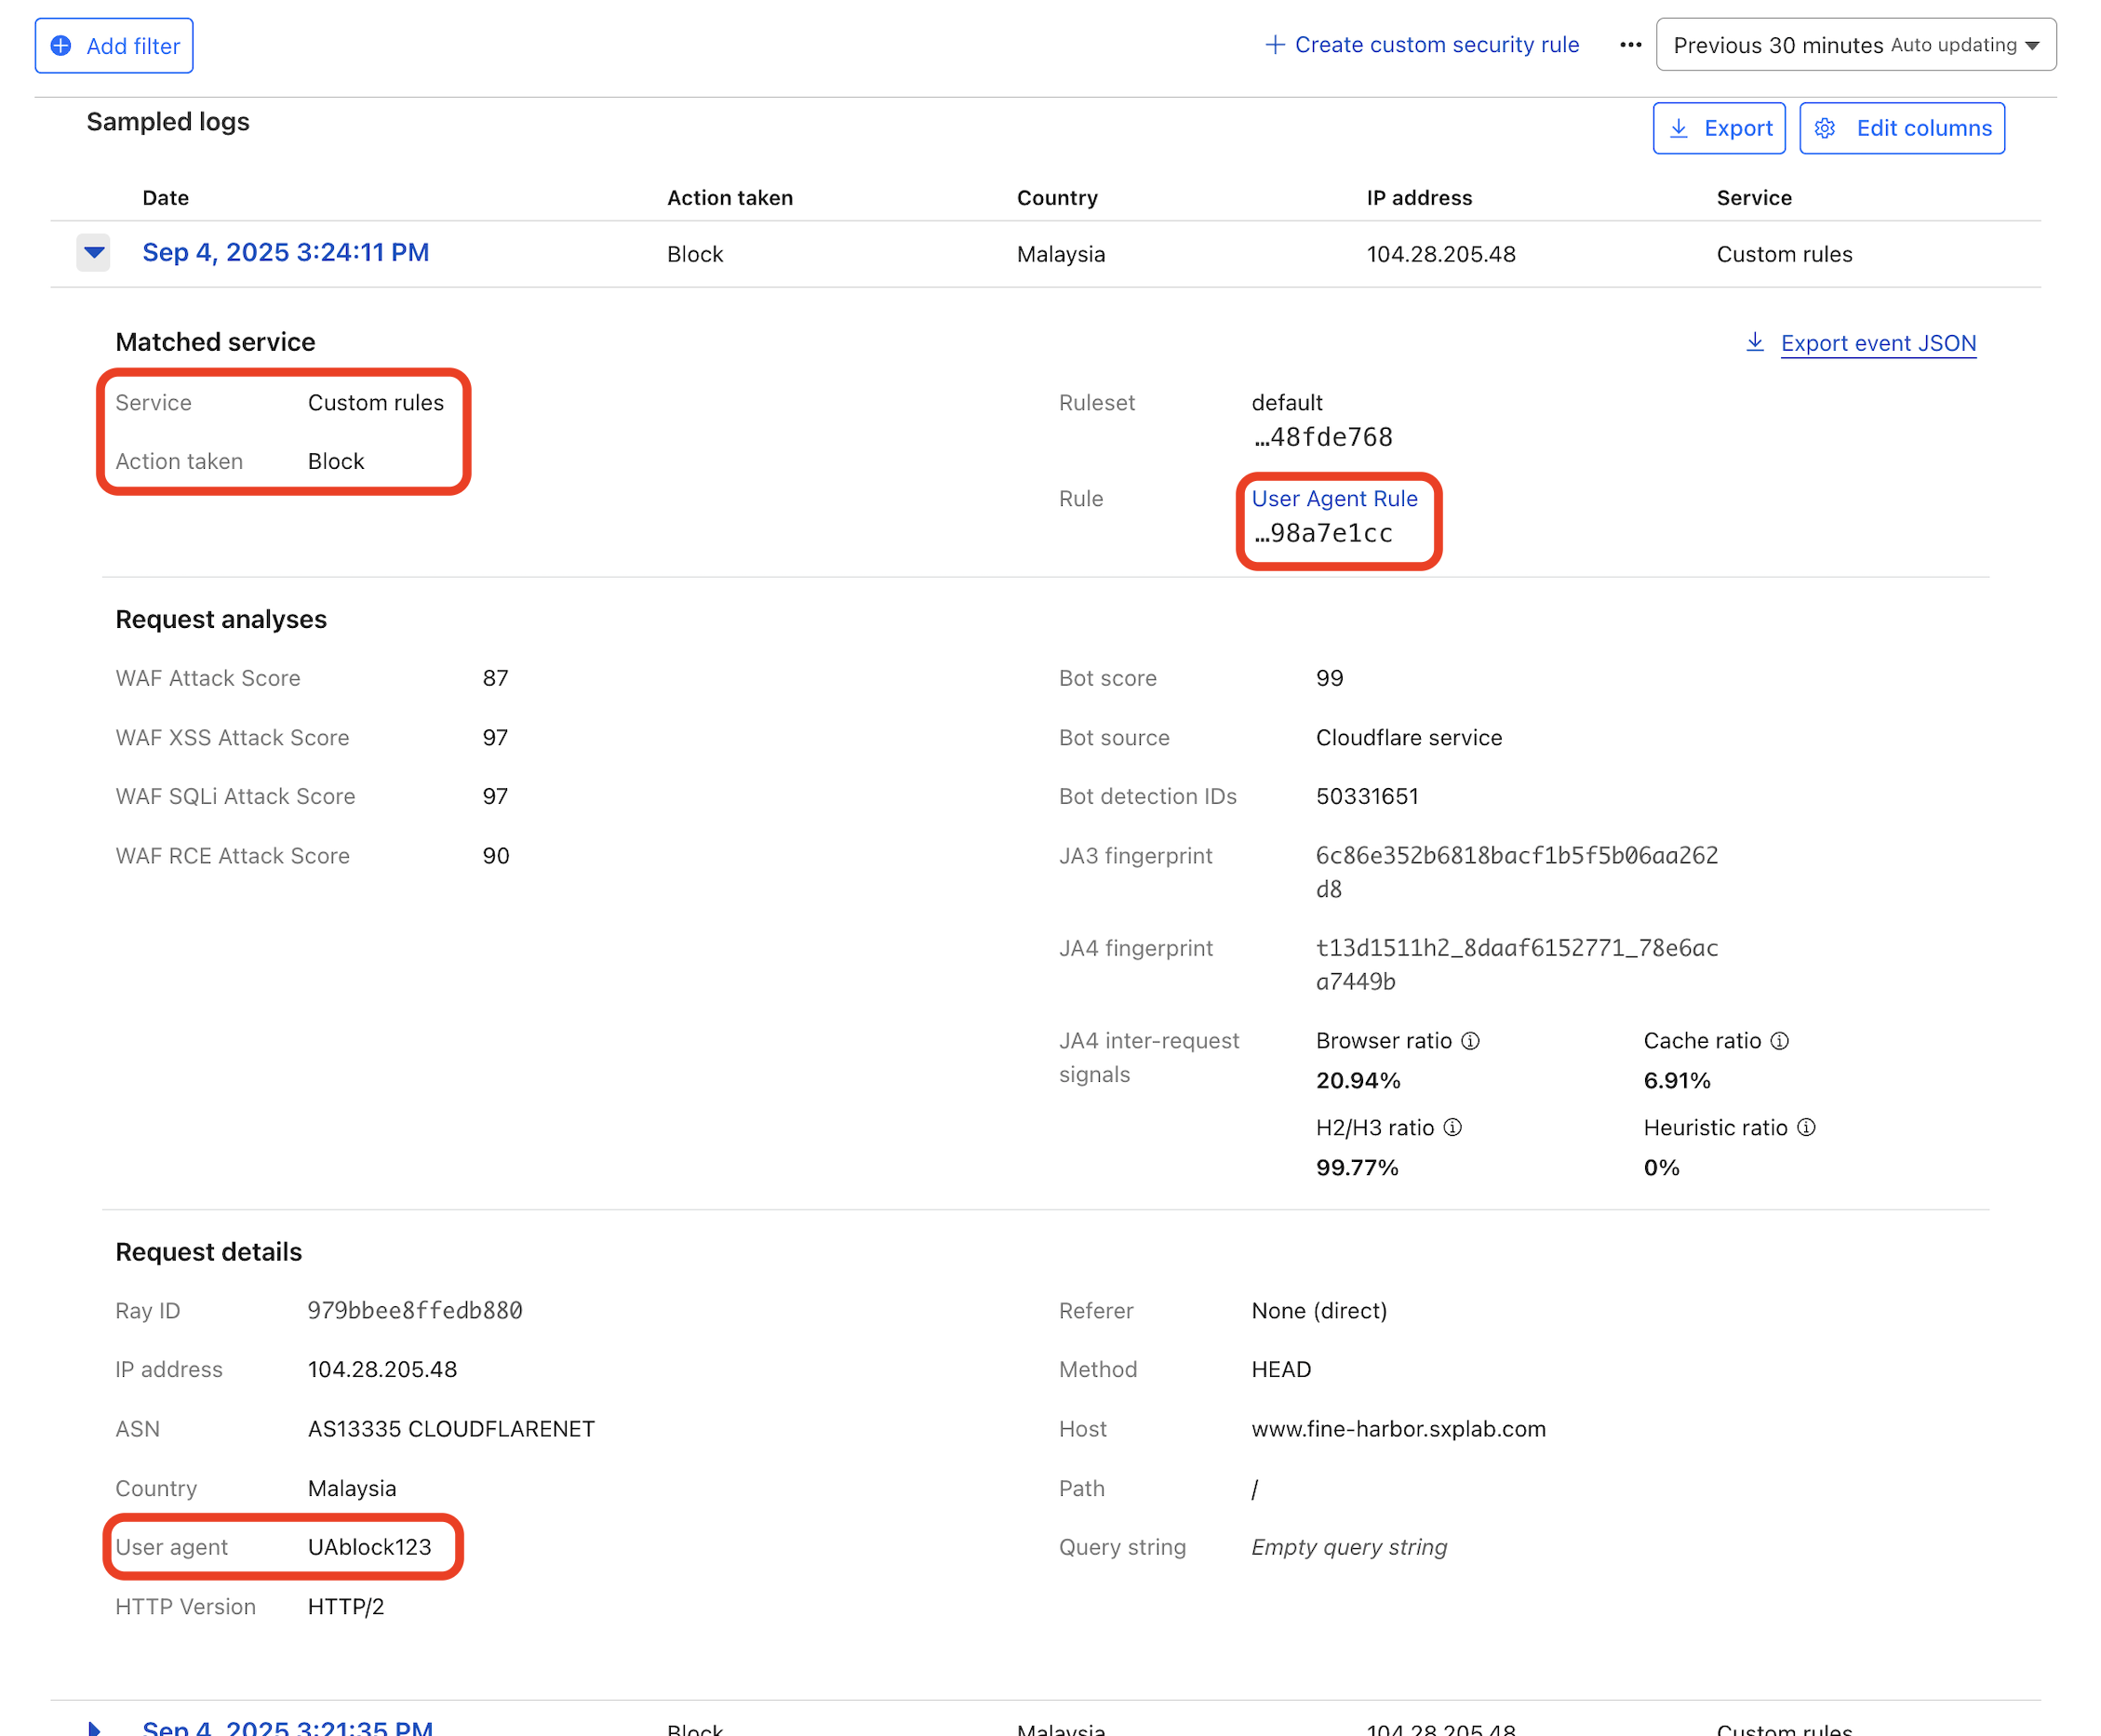
Block vulnerable endpoints
-
Try to visit the URL :
https://<yourdomain>/wp-admin, you should have no issue accessing it.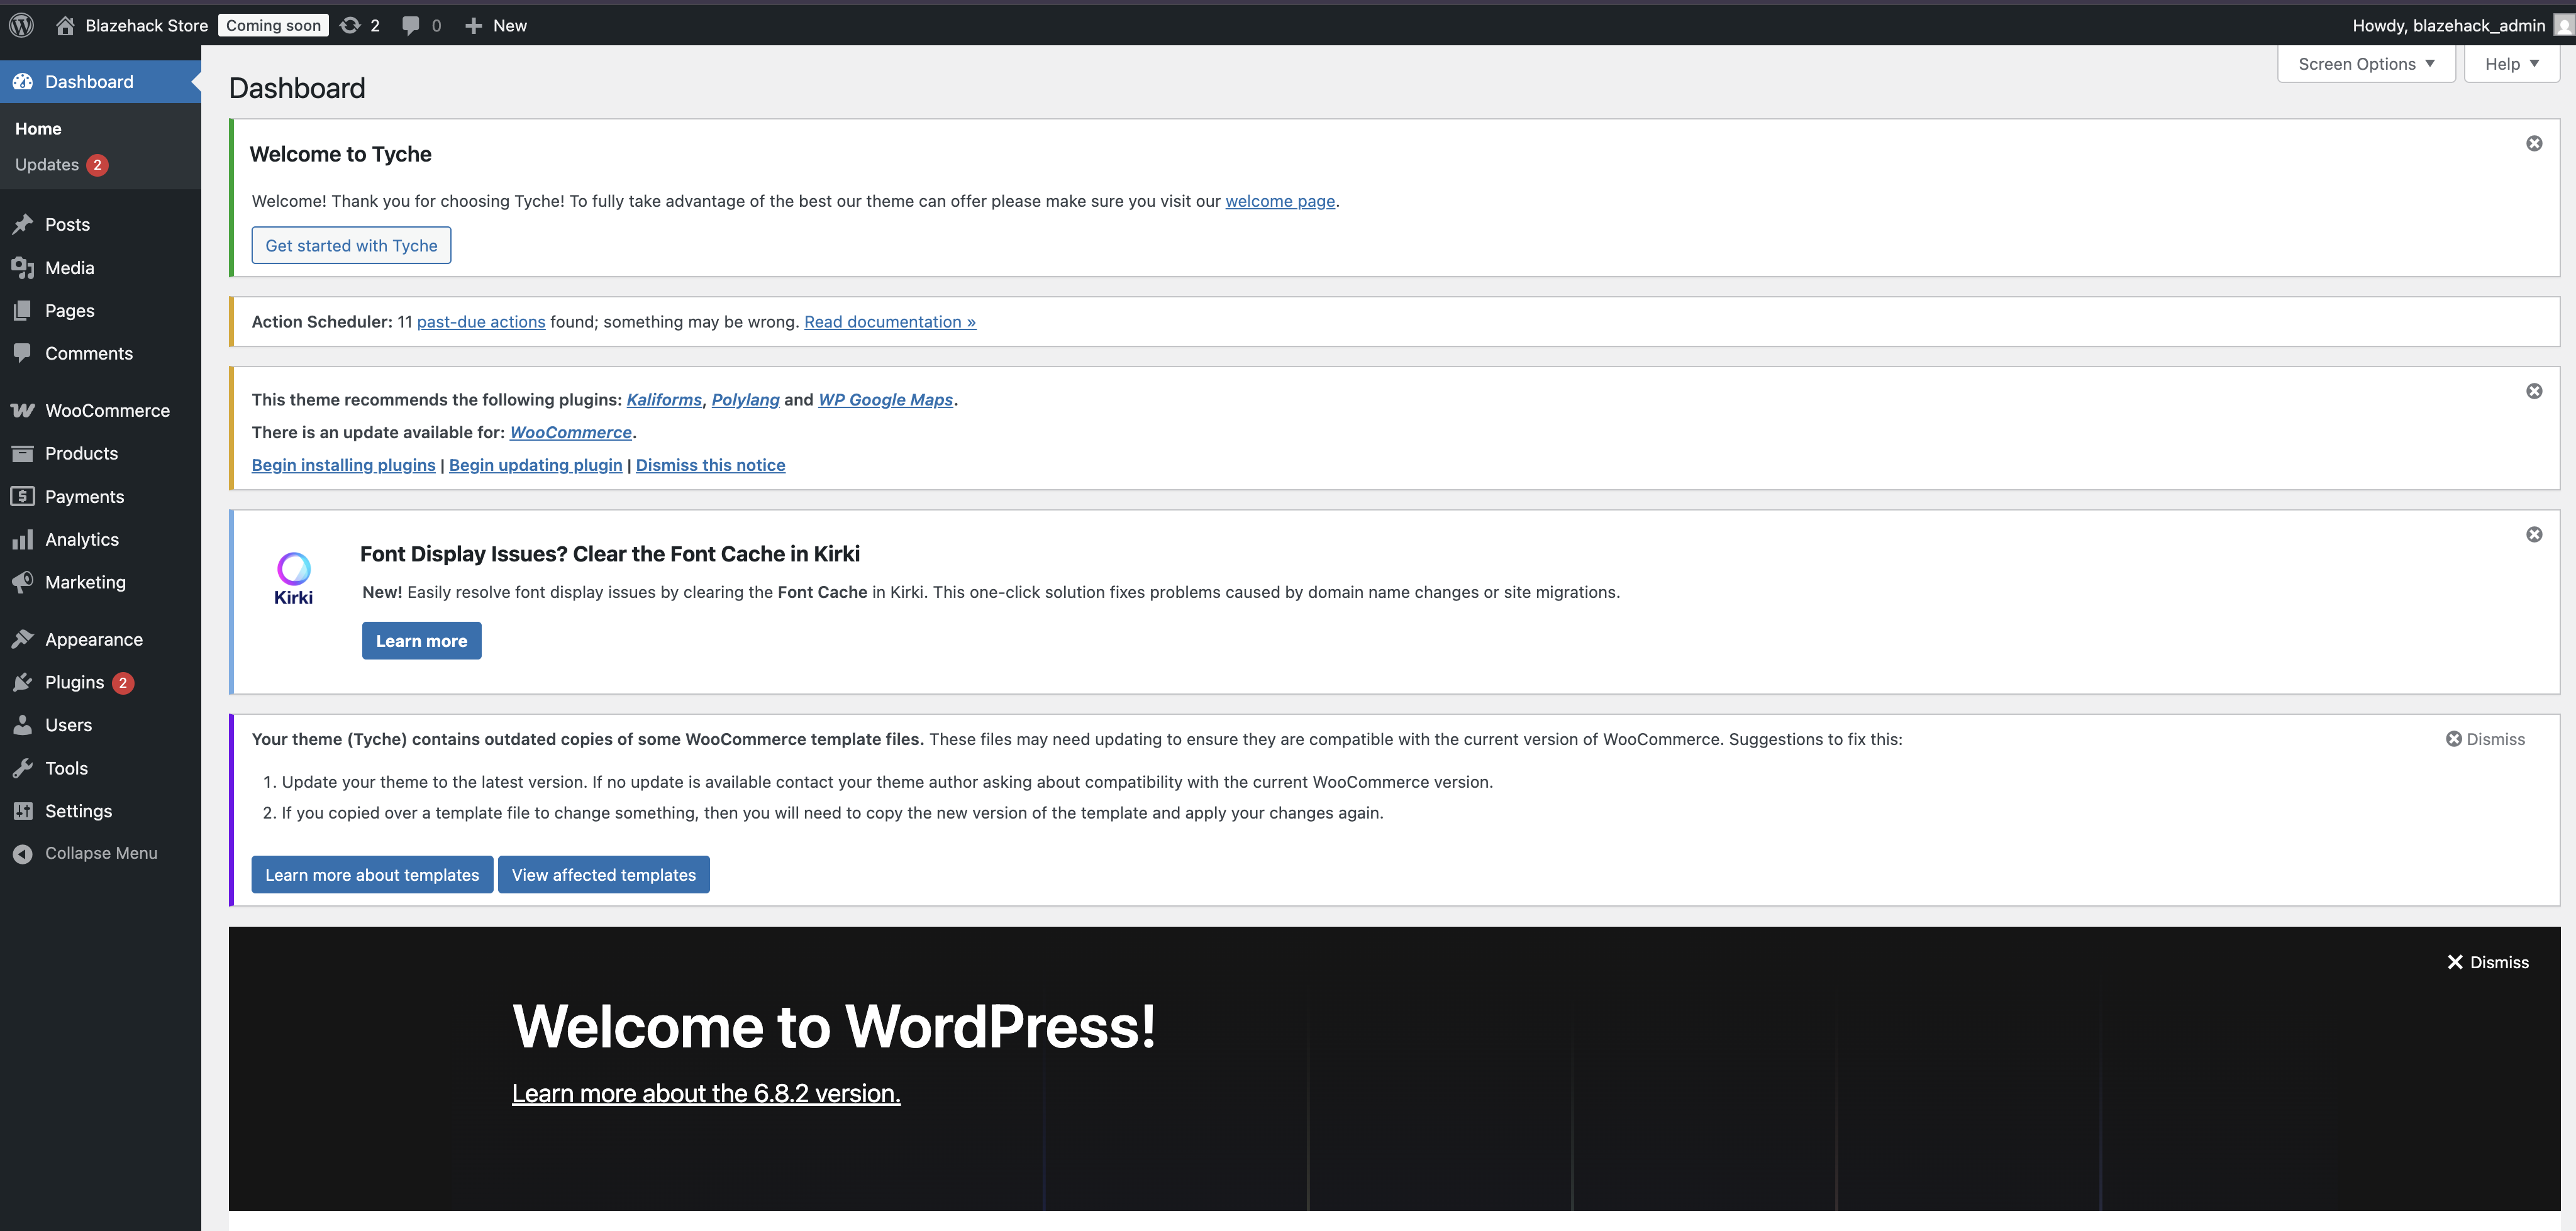
-
In the Cloudflare Dashboard go to Security > Security rules > Create rules
-
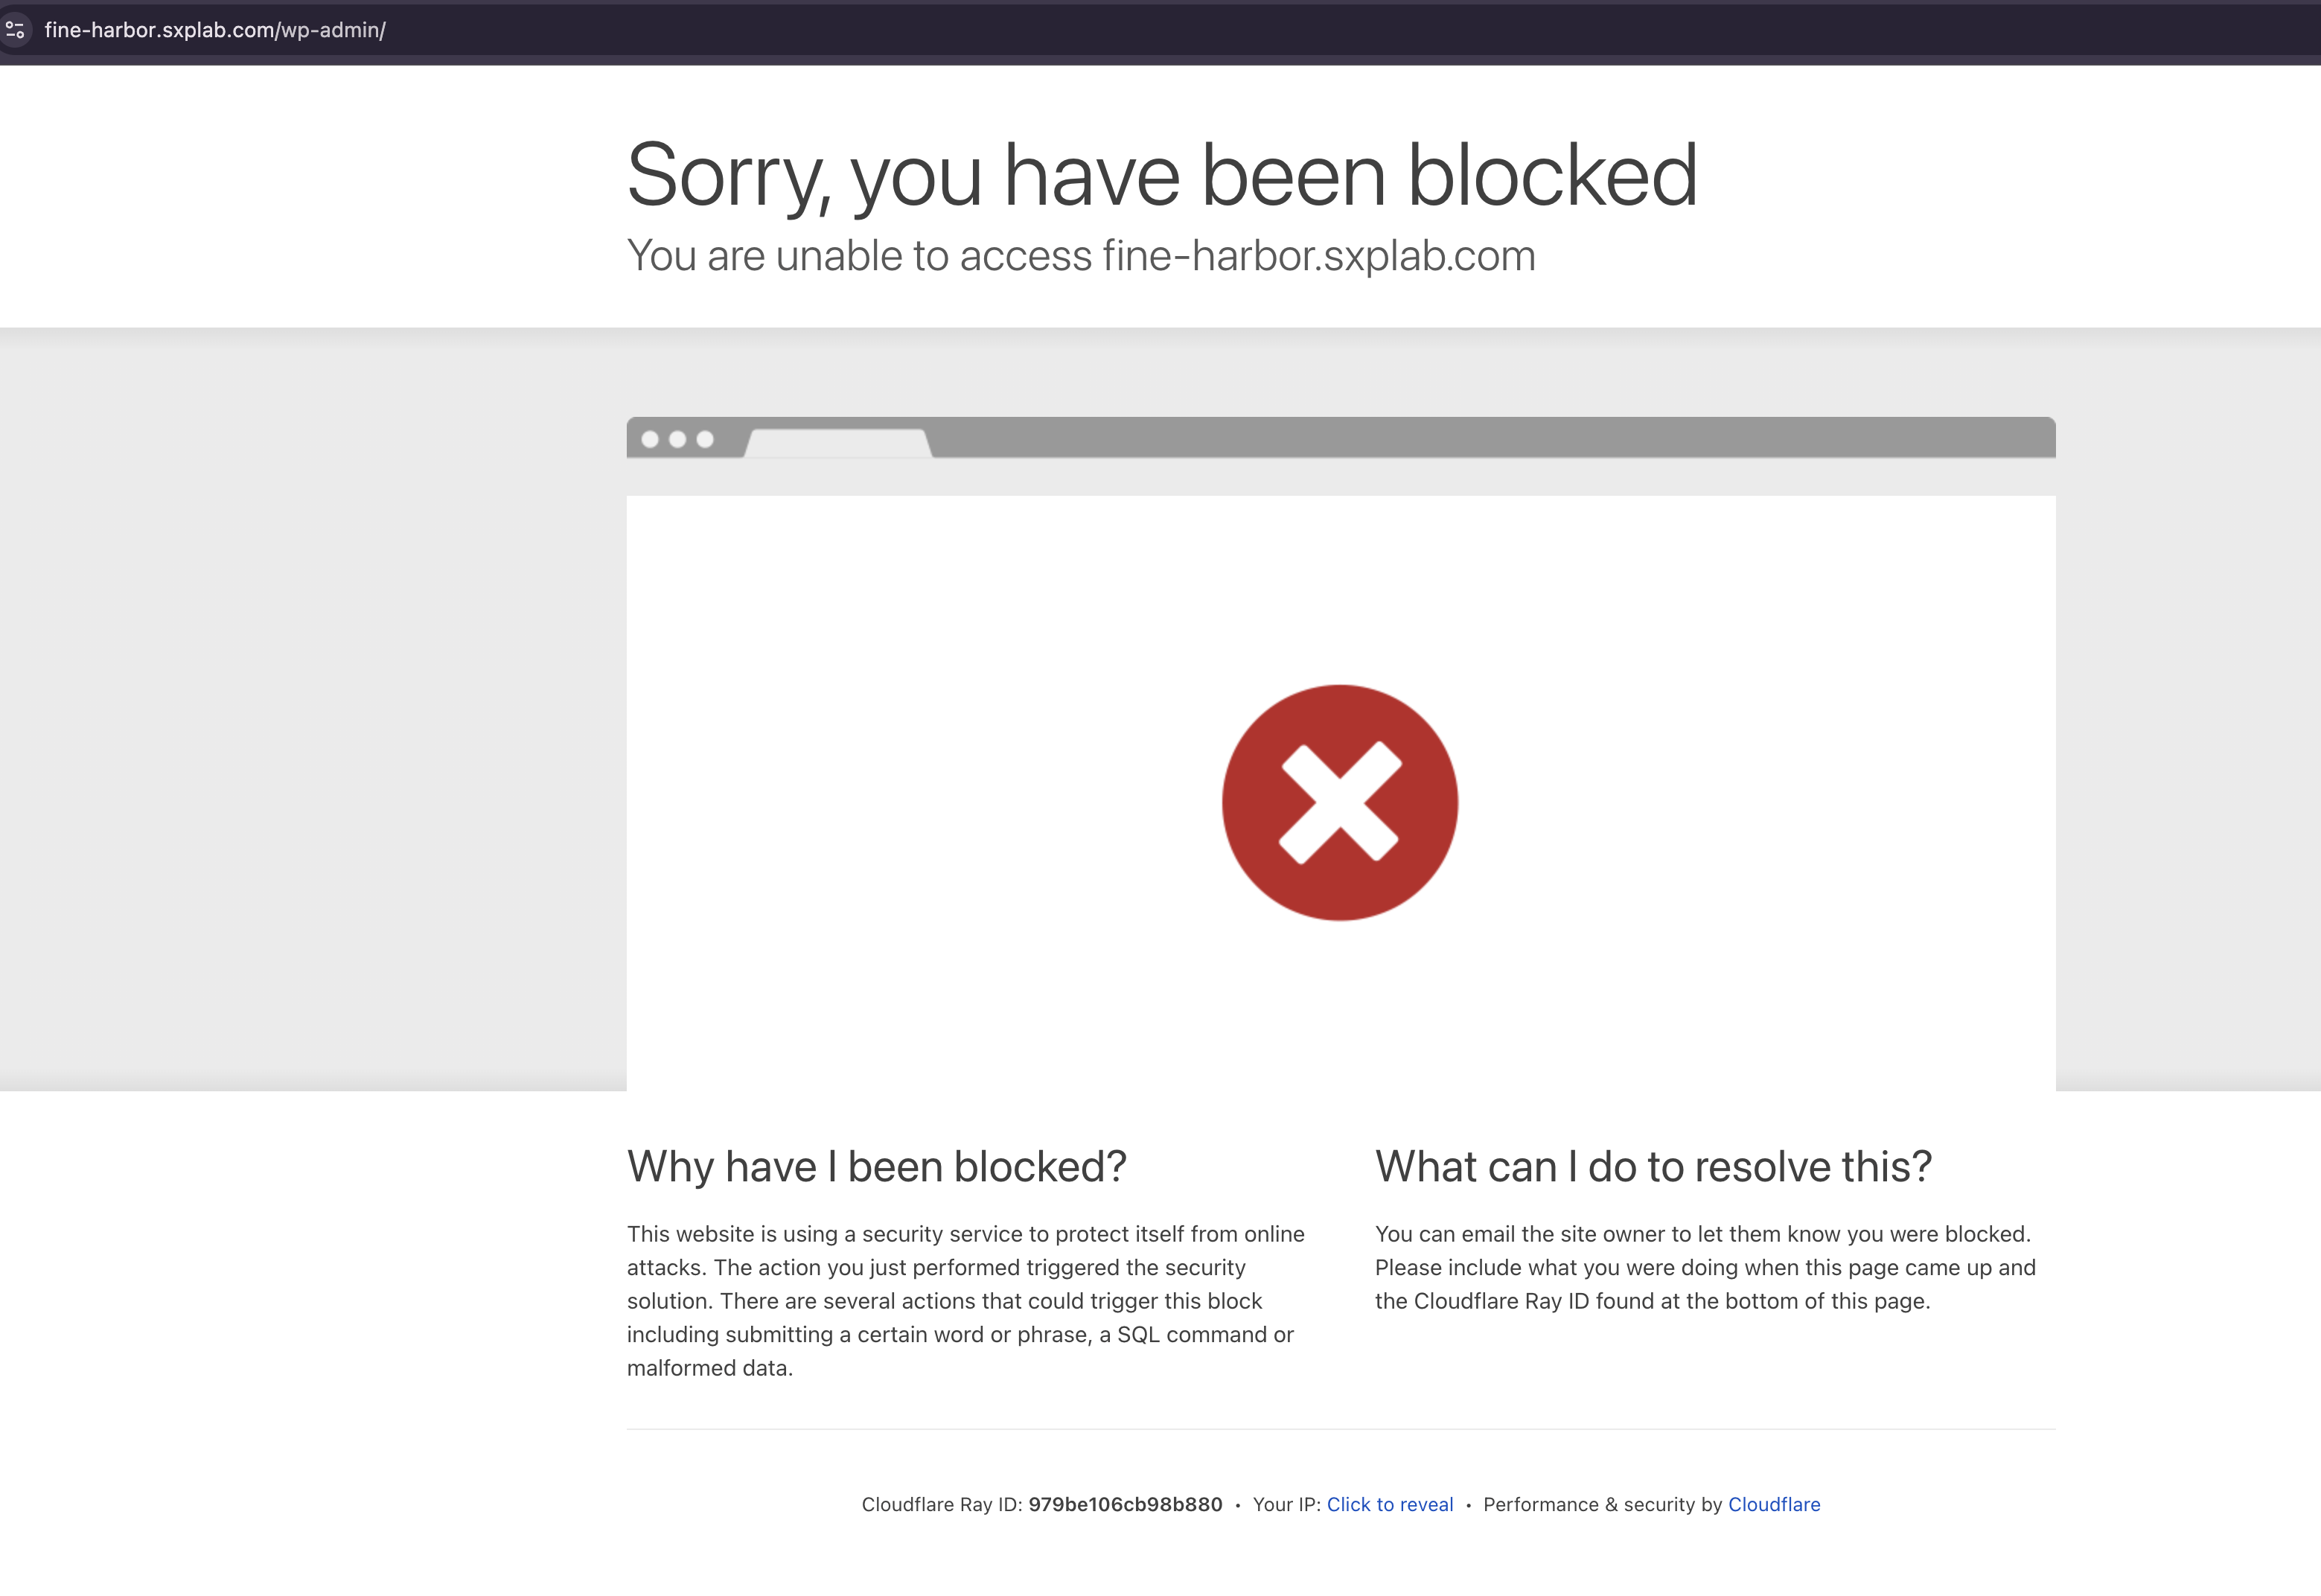
Create a rule blocking possible exploit endpoints, for this we will use the URI /wp-admin
- Rule Name:
Block /wp-admin - Field:
URI Path - Operator:
contains - Value:
/wp-admin - Choose action:
Block - Select Order:
Custom - Select which rule this will fire after:
Whitelist Own IP - When done, click Deploy
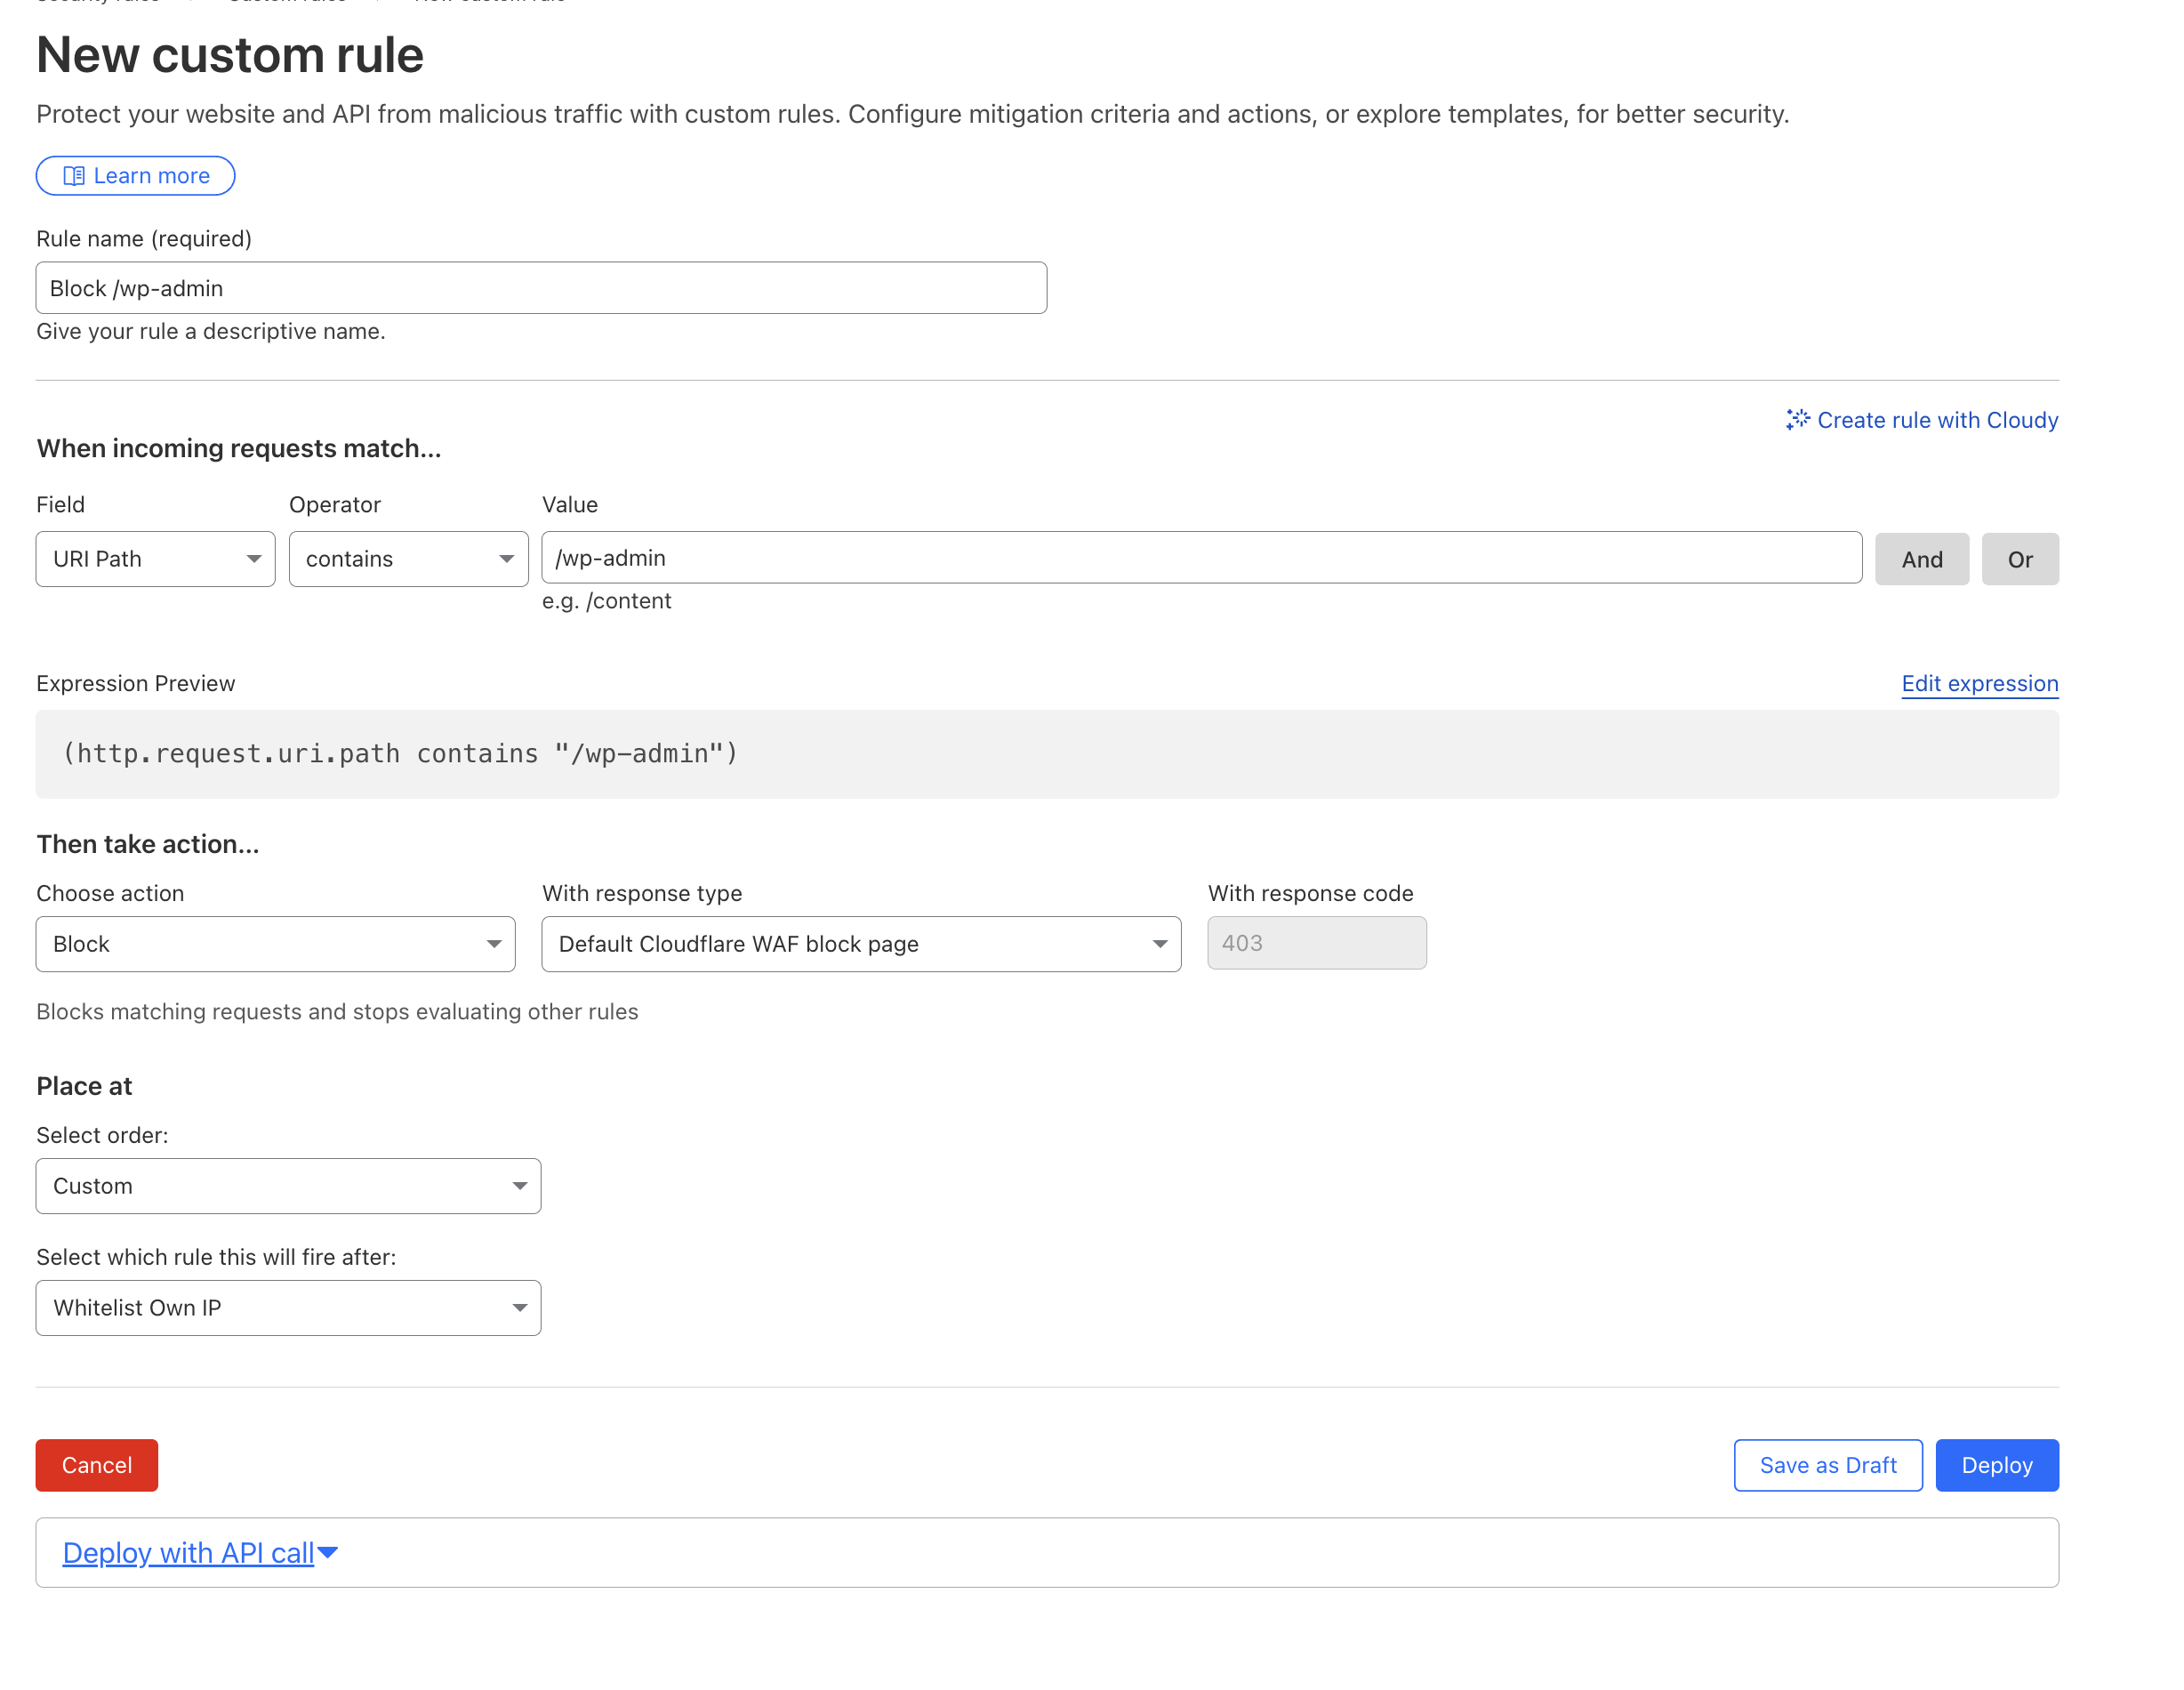
- When visiting the same URL, you are probably met with a 403 status code. Check the events log to see if it reflects on your security events log
Key Takeaway
Custom Rules give you granular control over how traffic is handled.
You can allow trusted users, block known threats, and protect sensitive paths — all without relying only on managed rules.
By combining conditions such as region, IP address, user agent, and URI paths, you can design security policies that are both precise and flexible, ensuring your application stays secure while legitimate traffic continues without interruption.
⚡ Remember:
- Rule order matters. Place your allow/whitelist rules first, so they take priority over broader block rules.
- Always start with the action set to Log only, before switching to Block/Challenge. This helps you test safely, since blocking rules will directly impact production requests.